7-6
Cisco ATA 186 and Cisco ATA 188 Analog Telephone Adaptor Administrator’s Guide (SCCP)
OL-3141-01
Chapter 7 Upgrading the Cisco ATA Signaling Image
Confirming a Successful Signaling Image Upgrade
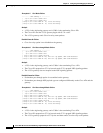
Step 3 Using the telephone keypad, enter the following:
100# ip_address_of_PC * port #
This is the IP address of the PC and the port number at the DOS prompt where you invoked the
ata186us.exe file.
For example, if the IP address is 192.168.1.10, and the port number is 8000 (the default), then enter:
100#192*168*1*10*8000#
When the upgrade is complete, the "Upgrade Successful" prompt will sound.
Note When upgrading many Cisco ATAs manually, you can save the software-upgrade dial-pad sequence in
your telephone's speed-dial, and use this sequence repeatedly.
Confirming a Successful Signaling Image Upgrade
You can verify that you have successfully upgraded the Cisco ATA signaling image by using one of the
following methods:
• Using a Web Browser, page 7-6
• Using the Voice Configuration Menu, page 7-7
Using a Web Browser
To use your web browser to verify a successful image upgrade, perform the following steps:
Procedure
Step 1 Open your web browser.
Step 2 Enter the IP address of your Cisco ATA Web configuration page:
http://<IP address>/dev
Step 3 Refresh the page to clear the cache.
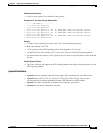
The image version number and its build date should appear at the bottom-left corner of the Cisco ATA
Web configuration page.


