7-3
Cisco ATA 186 and Cisco ATA 188 Analog Telephone Adaptor Administrator’s Guide (SCCP)
OL-3141-01
Chapter 7 Upgrading the Cisco ATA Signaling Image
Upgrading the Signaling Image Via Cisco CallManager
Procedure for Upgrading One Cisco ATA
Step 1 Download the latest Cisco ATA release software for SCCP from the Cisco web site, and store the files
on the Cisco CallManager TFTP server. For more information, see the “Setting Up the TFTP Server with
Cisco ATA Software” section on page 3-8.
Step 2 Go to the main Cisco CallManager Administration screen.
Note Before continuing this procedure, make sure that the Load Information field for the Cisco ATA
186 Device Type is set to 0 on the Device Defaults screen (System > Device Defaults).
Step 3 From the Device pull-down menu, select Phone. The Find and List Phones screen appears.
Step 4 In the area next to the Find button, enter a portion or all of the Cisco ATA MAC address, then press Find.
The Find and List Phones screen reappears, and now contains the Cisco ATAs that match the find criteria
you entered in the previous screen.
Step 5 Click the icon of the Cisco ATA whose signaling image you would like to upgrade. The Phone
Configuration screen appears.
Step 6 In the Phone Load field, enter the name of the signaling image (the signaling image has an extension of
.zup, for example, ATA186-v2-15-ms-020812a.zup).
Step 7 Press Update.
Step 8 You will receive a message that you should reset the device. Click OK.
Step 9 Click the Reset Phone button on the Phone Configuration screen.
Step 10 The Reset Device pop-up window appears. Click Reset.
Step 11 A confirmation box appears. Click OK.
The Function button on the Cisco ATA blinks during the upgrade. Once the button stops blinking, the
upgrade is complete and the device re-registers to the Cisco CallManager.
If you use this method, you should be running Cisco CallManager versions 3.0 or 3.1 only.
If you are a registered CCO user. go to the following URL:
http://www.cisco.com/cgi-bin/tablebuild.pl/ata186
Download the zip file that contains the software for the applicable release and signaling image you are
using. The contents of each file are described next to the file name. Save the zip file onto a floppy disc.
Running the Executable
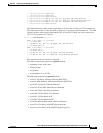
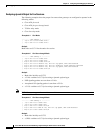
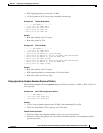
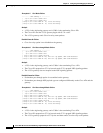
upgradecode Syntax
upgradecode:3,0x301,0x0400,0x0200,tftp_server_ip,69,image_id,image_file
upgradecode Definitions
The following values need to be modified:
• tftp_server_ip is the TFTP server which contains the latest image (image_file).
Procedure for Upgrading One Cisco ATA
Step 1 Download the latest Cisco ATA release software for SCCP from the Cisco web site, and store the files on
the Cisco CallManager TFTP server. For more information, see the “Setting Up the TFTP Server with
Cisco ATA Software” section on page 3-8.
Step 2 Go to the main Cisco CallManager Administration screen.
Note Before continuing this procedure, make sure that the Load Information field for the Cisco ATA 186
Device Type is set to 0 on the Device Defaults screen (System > Device Defaults).
Step 3 From the Device pull-down menu, select Phone. The Find and List Phones screen appears.
Step 4 In the area next to the Find button, enter a portion or all of the Cisco ATA MAC address, then press Find.
The Find and List Phones screen reappears, and now contains the Cisco ATAs that match the find criteria
you entered in the previous screen.
Step 5 Click the icon of the Cisco ATA whose signaling image you would like to upgrade. The Phone Configuration
screen appears.
Step 6 In the Phone Load field, enter the name of the signaling image (the signaling image has an extension of .zup,
for example, ATA186-v2-15-ms-020812a.zup).
Step 7 Press Update.
Step 8 You will receive a message that you should reset the device. Click OK.
Step 9 Click the Reset Phone button on the Phone Configuration screen.
Step 10 The Reset Device pop-up window appears. Click Reset.
Step 11 A confirmation box appears. Click OK.
The function button on the Cisco ATA blinks during the upgrade. Once the button stops blinking, the
upgrade is complete and the device re-registers to the Cisco CallManager.


