


38 CHAPTER 4: 3105 ATTENDANT CONSOLE
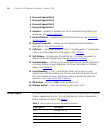
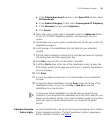
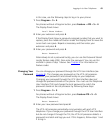
7 Access buttons — If your administrator has mapped an extension to an
Access button, a light next to the button indicates whether the line is
available or in use, or whether an assigned feature is enabled. See
Attendant Console Status Lights
.
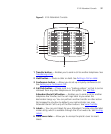
Your administrator uses the VCX Administrator web interface to map
telephone extensions to Access buttons numbers. The interface numbers
each button. For example, the administrator may say that extension 4001
is assigned to button 1, extension 4002 is assigned to button 2, and so
on. On the Attendant Console, the buttons are numbered from top to
bottom, starting in the top left corner. (However, no number physically
appears next to a button.)
■ The first five buttons from the top in the left column correspond to
Access buttons 1 through 5. (The bottom four buttons are always
the Feature buttons.)
■ The second column of nine buttons correspond to Access buttons
6 through 14.
■ The third column of nine buttons correspond to Access buttons 15
through 23.
■ The fourth column of nine buttons correspond to Access buttons
24 through 32.
■ The fifth column of nine buttons correspond to Access buttons 33
through 41.
■ The sixth column of nine buttons correspond to Access buttons 42
through 50.
8 Shift button — Enables you to toggle between the two sets of Access
button assignments on the Console. Press the Shift button to switch
between assignments 1 through 50 and assignments 51 through 100.
The Shift button LED is lighted when you have buttons 51 through 100
selected.
Printing Labels To create, print, and save labels for your Attendant Console (or any VCX
telephone):
1 Access the 3Com web site, http://www.3com.com.
2 Click Support & Downloads and select Downloads & Drivers from the
drop-down list box.
Your browser displays the Downloads page.
3 On the Downloads page, select the following options: