


IPedge
Using Call Manager Features
100 TOSHIBA
IPedge UG 06/11
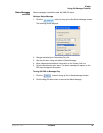
Viewing Extra Call
Information
Call Manager has the ability to attach, retain, and display extra information
taken on a call. This could include information input by an IVR, added/
attached information by the Call Router, attached from a database, or added
by any user who handled the call. This information is retained with the call as
it is transferred about in the phone system. The following Call Info icons are
displayed in the Calls window or LCD Display to indicate the presence of
additional information. The icon changes color depending upon the
information available:
• – No call information attached to this call.
• – Normal call information attached to this call.
• – At least one field of priority call information is attached.
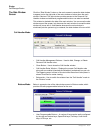
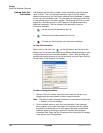
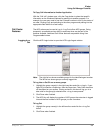
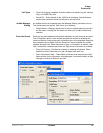
To View Call Information
Right click the “Call Info” icon on the right side of the Call key for the
desired call. This window can contain many different fields depending on your
configuration and the call information attached. Note: These windows can
automatically popup whenever a new call arrives by using the Popup Call Info
Screen action in the Personal Call Handler.
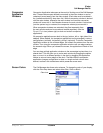
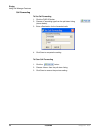
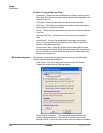
To Add or Change Information
1. With the “Call Info” window open, place the cursor into the box to be
changed and use the keyboard to add or erase information.
Note: The ability to add or change information is controlled by Preferences
> General > Extra Info settings.
2. Click the Update button to save the new information. Once changed,
other programs will use this information. For example, the call is being
screened and transferred into an ACD queue; the caller could define a
Preferred Agent by entering an agent’s ID into the Preferred Agent
Information field. When the call is transferred this information is available
to be used by the ACD application.