140 Model 6731i IP Phone User Guide
Managing Calls
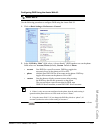
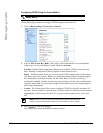
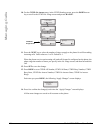
7. For the "No Answer" state, in the “No. Rings” field, enter the number of times that the
account rings before forwarding the call to the specified number. Valid values are 1 through
20. Default is 1.
When using the “Account” mode or “Custom” mode, you can enter a different number of
rings for each account. If you use the Aastra Web UI to change the Call Forward Key Mode
to “Phone”, all accounts synchronize to Account 1.
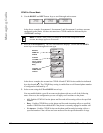
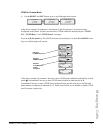
8. (Optional) You can configure a Call Forward key on your phone to access the Call Forward
menus if desired. You can also access the Call Forward menu from the IP Phone UI at the
path, Options->Call Forward. To create a Call Forward key, see “Call Forward Key” on
page 83.
9. Click to save your changes.
The changes takes affect immediately without a reboot.
Notes:
1. If you selected “Account” mode in step 2, you can enable/disable each
account or all accounts as applicable. You can enter different phone number for
each enabled state.
If you selected “Custom” mode, you can enable/disable each account or all
accounts as applicable. You can enter different phone numbers for each enabled
state.
If you selected “Phone” mode, all accounts are set to the same CFWD
configuration (All, Busy, and/or No Answer) as Account 1 on the phone. (In the
Aastra Web UI, only Account 1 is enabled. All other accounts are grayed out but
use the same configuration as Account 1.)
Using the Aastra Web UI, if you make changes to Account 1, the changes apply
to all accounts on the phone. Using the IP Phone UI, if you make changes to any
other account other then Account 1, the changes also apply to all accounts on the
phone. When enabling a CFWD state, you must specify a phone number for the
phone to CFWD to. The number you specify applies to all accounts of the same
mode.
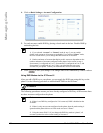
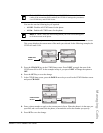
2. Number and name of accounts that display to this screen are dependant on the
number and name of accounts configured on the phone. In the screen in step 4,
Screenname1 is configured on Line 1, Screenname2 is configured on Line 2, and
Screenname3 is configured on Line 3. The name for the account is specified by
your System Administrator. Contact your System Administrator for more
information.


