


SRS-1050 Local Features ( Chapter 3
Page 3-38
926*3112 (the asterisk is explained below)
The extension number alone works because the recipient digital set matches the specified and incoming numbers
from right to left, stopping after the number of digits entered during the setup. Entering the full number negates the
possibility that an outside call with the same last four digits in the calling number (for example, 422-3112) could
activate the intercom.
The asterisk in the number 926*3112 is a wild card. The digital set accepts any character in this position. You need
the wild card to represent the dash (-) if a dash is included in the number delivered with an incoming call. If you are
in doubt, have the person who will be screening calls call you, and note the number displayed on the first line of
the LCD.
The set supports up to three numbers for screeners. To have more than three screeners, use * as a wild card. For
example, entering 311* allows both the Directory Numbers 3112 and 3115 to activate the intercom. Remember,
however, that all other Directory Numbers from 3110 to 3119 would also activate the intercom.
Required support from your System Administrator
To guarantee that Directory Numbers are always available for call announce intercom, the System Administrator
should:
• Set one Directory Number on the digital sets of both recipients and screener as outgoing only
• Assign a Priority feature button on the call screener's digital set to override the outgoing-only Directory Number
on the recipient's digital set.
Recipients should mark the outgoing-only Directory Number for intercom use and avoid using it for calls. The
outgoing-only Directory Number on the screener's digital set should be the one authorized for intercom use when
recipients enable the feature. Any backup positions for the call screener should duplicate the attributes of the
screener's digital set.
Notes:
• Some of the data entry displays have built-in timers. If you do not enter information within fifteen seconds, the
display reverts to the menu for selecting the feature you were setting up. You must reselect the feature and
start again.
• If for any reason you become confused, ;you can always press REG (softkey 4) to return to the menus and start
over.
Enabling or Disabling Call Announce Intercom
To enable or disable call announce intercom, follow these steps:
1. Press REG (softkey 4), 11, ENTER (softkey 1).
A screen appears showing the current status of the intercom feature. If one- or two-way intercom is enabled, the
screen displays the enabled mode plus the authorized Directory Number (see step 4 below). If the intercom is
disabled, the screen displays NON SUPPORTED.
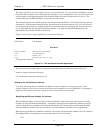
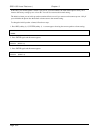
INTERCOM FEATURE (1)
NON SUPPORTED