


Change Server PC Name Overview
Compact Contact Center Installation & Maintenance
40DHB0002USBG Issue 1 (11/14/2001) Change Server PC Name
•
Page 23
Change Server PC Name
Overview
It is vital that the Server PC used to run the CCC modules is called
ARCHIVERSQL whilst installing the applications. Once the installation is
complete, change the PC name and workgroup name if desired, as detailed
in this section, prior to connecting the PC to the network.
The following procedure has to be performed after the CCC applications
have been installed on the relevant PCs. However you must ensure none
of the CCC applications are running.
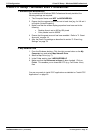
NT4 Server PC
Change Server PC Name
Make sure that there are no programs running on the server then follow the
instructions below.
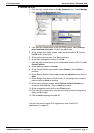
1. From the Windows Taskbar, click Start, point to Settings and select
Control Panel, double click Network,
2. From the Identification tab click Change.
3. Type your computer name as required. Click OK.
4. From the Identification tab, click OK to confirm.
5. When prompted, click Yes to restart the PC.
6. If you are using MSDE you will need to re-install it as detailed in section
"4.1 Installing MSDE 2000" on page 13 and then proceed to the section
"Change ODBC Settings" on page 24.
If you are using SQL 2000 continue to following the instructions given
below.
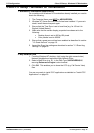
7. From the Windows Taskbar, click Start, point to Programs, select SQL
Server, and then select SQL Query Analyzer.
8. Enter the new PC name in the SQL Server field.
9. Select the SQL Server Authentication option and enter sa as the Login
name, leaving the password field empty.
10. Click OK
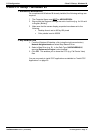
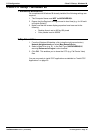
11. Execute the following command
sp_dropserver ARCHIVERSQL
12. Execute the following command
sp_addserver # # # # # # # # # #,LOCAL
(e.g. if the server PC has been renamed as ARCHIVERSQL123 enter
sp_addserver ARCHIVERSQL123,LOCAL.)
13. Re-boot the Server PC.
14. Now proceed to the section "Change ODBC Settings" on page 24.