


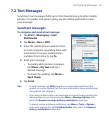

124 Exchanging Messages
• Tap
to record an MMS video clip and insert it into the picture
message.
• Tap the Exit
icon ( ) to quit selection and return to the picture
message.
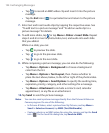
7. Enter text and insert audio clips by tapping the respective areas. See
“To add text to a picture message” and “To add an audio clip to a
picture message” for details.
8. To add more slides, tap or tap Menu > Slides > Insert Slide. Repeat
steps 5 and 6 to insert a photo/video, text, and audio into each slide
that you added.
While on a slide, you can:
• Tap to preview the slide.
• Tap to go to the previous slide.
• Tap to go to the next slide.
9. While composing a picture message, you can also do the following:
• Tap Menu > Options > Background to choose a background
color from the list.
• Tap Menu > Options > Text Layout, then choose whether to
place the text above, below, to the left or right of the photo/video.
• Tap Menu > Options > Send Options to specify the sending time,
expiration, priority, category, and other settings for a message.
• Tap Menu > Attachment to include a contacts card, calendar
appointment, or any file as an attachment.
10. Tap Send to send the picture message.
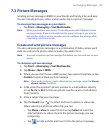
Notes You can also send a picture message directly from the Pictures & Videos or
Camera program. Do one of the following:
• In Pictures & Videos, select a picture from My Pictures, and tap Menu >
Send. In Select an Account, tap MMS (Text/Multimedia).
• Capture a photo or an MMS video clip using the camera, and tap the Send
icon ( ). In the Send File dialog box, tap Send via MMS.