


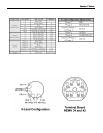


Section 5 TutorialSection 5 Tutorial
the program, you can start exactly where you left off by choosing the Start button. You
may want to try this for practice.
Cutting the Part
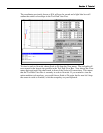
Assuming everything was fine in the previous step, we are ready to cut an actual part.
1. Check to make sure the Program Coordinates are at 0,0,0. If not, go through the
“Setting Program Zero on the Machine Tool” section above.
2. Now go into jog mode and carefully move the tool down in the Z- direction to the part
surface. This should be at the program coordinate 0,0,-1.
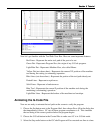
3. Set this point as Program Zero by choosing the Set button next to the Program label
and Choosing Zero All in the following dialog.
4. Now jog the tool 0.5” up in the Z+ direction. This places the tool in the correct starting
position to begin cutting the workpiece.
5. Go back into G-Code mode by choosing the G-Code button in the Control box.
6. Go into continuous mode by choosing the Continuous radio button.
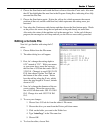
7. Turn the machine tool spindle on and make sure everything is ready on the CNC
Machine.
8. Choose the Start button and the CNC Machine will begin to cut out your first part.
Always be on alert to choose the Feed Hold button or hit any key in case of
emergency.
9. Congratulations, you’ve successfully cut your first part using LC!
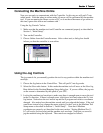
Exiting the Program
To exit LC choose Exit from the File menu. This will close communications with the
Controller and return you back to Windows.
Turning off the Controller
Always turn off the Driver Pack when not in use.