


Section 5 TutorialSection 5 Tutorial
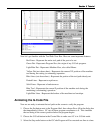
4. Choose the Start button and watch the blue tool move down the Z axis scale. Also note
that LC has highlighted the next line in the Program Listing Box, indicating it has fully
executed the first line.
5. Choose the Start button again. Notice the yellow dot, which represents the current
position of the tool, and the solid blue line, which represents the cutting move just
executed.
6. Now select the Continuous radio button and then choose the Start button again. Watch
as the yellow dot moves along the tool path and as the path already cut turns blue.
Also notice the status of the machine tool in the message box. At the end of the part
program, the message box will beep and tell you the file was successfully processed.
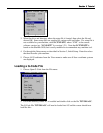
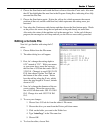
Editing a G-Code File
Now let’s get familiar with using the LC
editor.
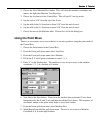
1. Choose Editor from the File menu.
2. The editor dialog box will appear.
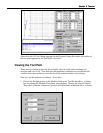
3. First, let’s change the cutting depth to
0.25” instead of 2.25”. With your mouse
or your arrow keys, move the cursor to
the first line of G-Code that reads: G01 Z-
2.25 F5.0. Change it to read: G01 Z-0.25
F5.0, then choose Update Tool Path on
the bottom of the editor screen. Notice
how the red line along the Z axis, which
shows the total length of Z travel, shrinks
down to 0.25”.
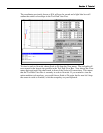
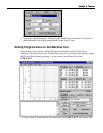
4. Now, let’s change the diameter of the arc
we are cutting. Move the cursor to the
line of G-Code that reads: G03 Y1.0 I0.0
J0.5. Change it to read: G03 Y2.0 I0.0
J1.0.
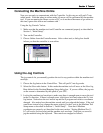
5. To save your changes:
1. Choose Save G-Code As from the editor’s File menu.
2. Choose the drive you want from the Drives pull-down menu.
3. Click on the folder you want in the Folder box.
4. Type “tutor2.agc” in the File name box.
5. Choose OK.
6. To close the editor, choose Exit.