


Preparation
24 For assistance, please visit http://www.panasonic.com/phonehelp
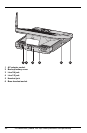
Setting-up the unit
before use
Setting the date and time
We recommend that you set the date and
time.
Voice Date/Time Stamp: After each
message playback, a synthesized voice
will announce the date and time that the
message was recorded (pages 53 and
55).
Note:
LIf a power failure occurs, the date/time
will be retained for at least 20 minutes
with the backup battery fully charged
(page 11). Re-adjust if the date/time is
incorrect.
LFor Caller ID service users (page 47)
– If the time is set to adjust automatically
(page 89), the Caller ID information
can set the clock after the first ring if
the time is incorrect.
– If the time is set to adjust
automatically, the Caller ID
information will automatically adjust
the clock for daylight saving time.
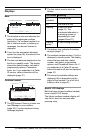
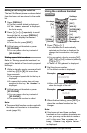
1 While in standby mode, press {MENU}.
2 Scroll to “Date and time” by pressing
{<} or {>}, then press {ENTER}.
3 Set the date and time using the keypad
keys ({0} to {9}). Use the {f} or {g}
keys to move the cursor to the digit to
change, then press the correct number
key.
L Enter the time in 12-hour notation. Do
not use military time.
4 Press {<} or {>} and hold, to select
“AM” or “PM”.
5 Press {ENTER}.
L Confirmation tone is heard.
Setting the display language
You can select either “English” or
“Español” as the display language. The
default is “English”. You must program
the base unit and each cordless handset
separately.
Note:
LChanging the display language also
changes the voice prompts to the
selected language.
Specifying the base unit language
1 Press {MENU}.
2 Scroll to “Initial setting” by
pressing {<} or {>}, then press
{ENTER}.
3 Scroll to “Change language” by
pressing {<} or {>}, then press
{ENTER}.
4 Press {<} or {>} to select the desired
language.
5 Press {ENTER}.
L Confirmation tone is heard.
Specifying cordless handset language
1 Press {MENU}.
2 Scroll to “Initial setting” by
pressing {V} or {^}, then press .
3 Scroll to “Change language” by
pressing {V} or {^}, then press .
4 Press {V} or {^} to select the desired
language.
5 Press .
L Confirmation tone is heard.
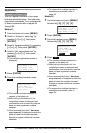
Example:
Base Unit
Date: 04.28.2006
>
=PM
Time: 02:37 AM
ENTER=Save
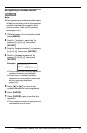
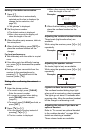
Base Unit
Handset
Select
Select
Save