


Programming Guidelines
Introduction
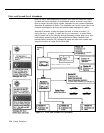
Once you have decided how you want the Attendant to work with your
telephone system and have connected the Attendant to the system’s control
unit, you are ready for programming. Programming modifies the Attendant and
the system’s control unit so they work together correctly.
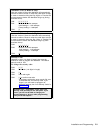
Two kinds of programming need to be done: Attendant Programming and
PARTNER Plus System Programming. To program the Attendant, use any
touch-tone phone that can dial [
★
] and [
#
] this means you can even do
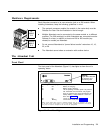
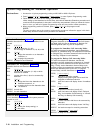
Attendant Programming when you are off site. On the other hand, System
Programming must be done on site, using either an AT&T MLS-12D or
MLS-34D display phone at extension 10, with the programming overlay placed
over the buttons of the phone. (The overlay was packed with your control unit.)
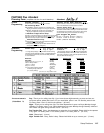
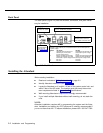
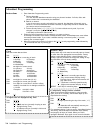
Using the Programming Charts
The rest of the chapter provides charts showing all the programming
procedures, starting with Attendant Programming and ending with System
Programming.
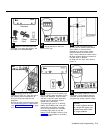
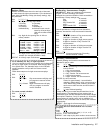
If you are setting up the Attendant for the first time, or if you are completely
reprogramming an Attendant, simply start with the first box of instructions and
perform all programming procedures in the order in which they are presented.
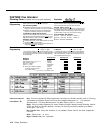
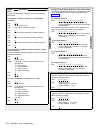
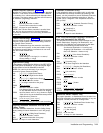
If you need to change a particular setting—for example, to program new
business hours or to have the Attendant pick up a new line—first enter
program mode by following the instructions in the appropriate Programming
Instructions box (page 2-6 for Attendant Programming or page 2-10 for System
Programming), then go to the box that gives instructions for the particular
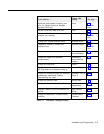
setting. Settings that are commonly changed are summarized in Table 2-1.
2-4 Installation and Programming