


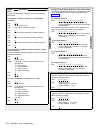
Attendant
Power
Cord
Phone
Cord
Mounting
Bracket
1
2
3
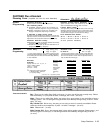
Make sure the above parts are
enclosed. If any parts are missing, call
the Helpline at 1 800 628-2888.
4
5
6
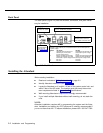
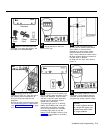
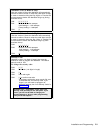
A Making sure all setup
switches are OFF (up), plug one end of
the modular phone cord into the "to
line" jack on the back panel of the
Attendant.
B Plug the other end of the phone cord
into an extension jack on a 206 module
(see "Hardware Requirements" on page
2-1).
Set all switches on the back
panel to OFF (up).
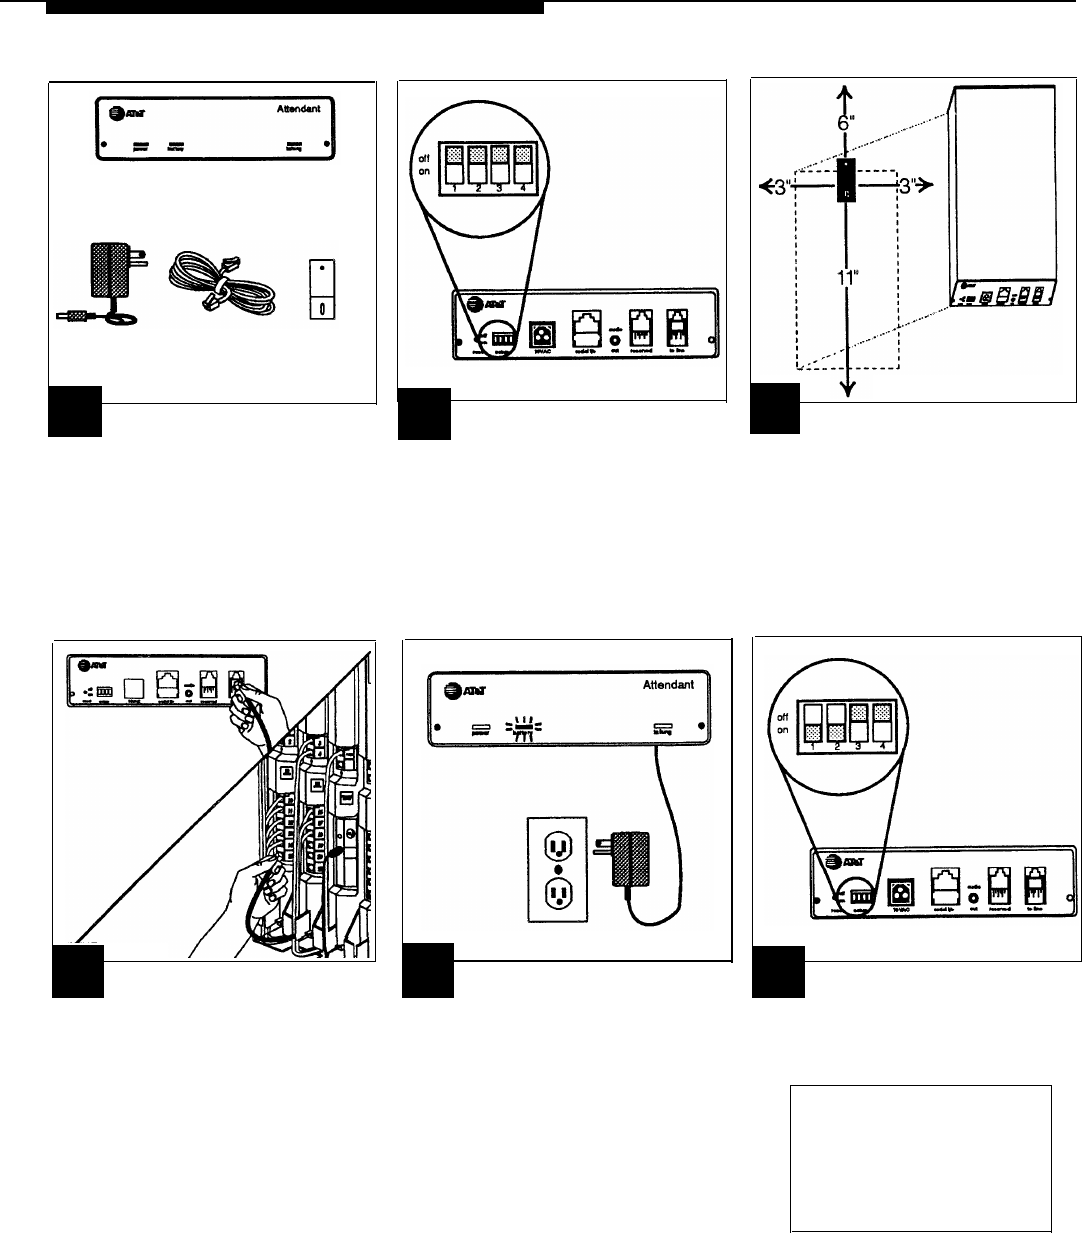
Plug one end of the power cord
into the 10VAC power connector on the
back of the Attendant. Plug the other
end into a 120V AC outlet, preferably
the same one to which the system
control unit is connected.
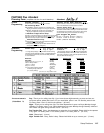
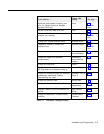
The power light goes on. A blinking
battery light indicates that announce-
ments have not yet been recorded.
Once announcements are recorded,
the battery light stays off until the
battery is fully charged (18 hours). See
page 2-7 for instructions on recording
announcements.
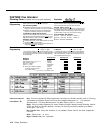
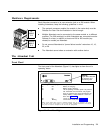
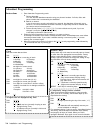
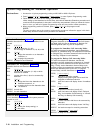
To wall mount with bracket:
A Using #10 or smaller screw (wood,
sheet metal, or concrete screw,
depending on wall surface), attach
bracket to wall so that hook end is
down. Leave clearances shown above.
B Align keyhole opening on bottom of
unit with hook on bracket.
C Slide unit over hook, then down to
secure it.
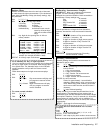
Move setup switches 1 and 2 to
ON (down). These settings will save
recorded announcements and other
programming during a power outage.
NOTE:
To install multiple devices
at a single AC outlet, use
a power strip with a built-
in surge protector.
Installation and Programming
2-3