


NBX 1105 Attendant Console 81
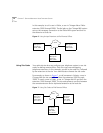
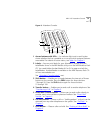
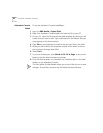
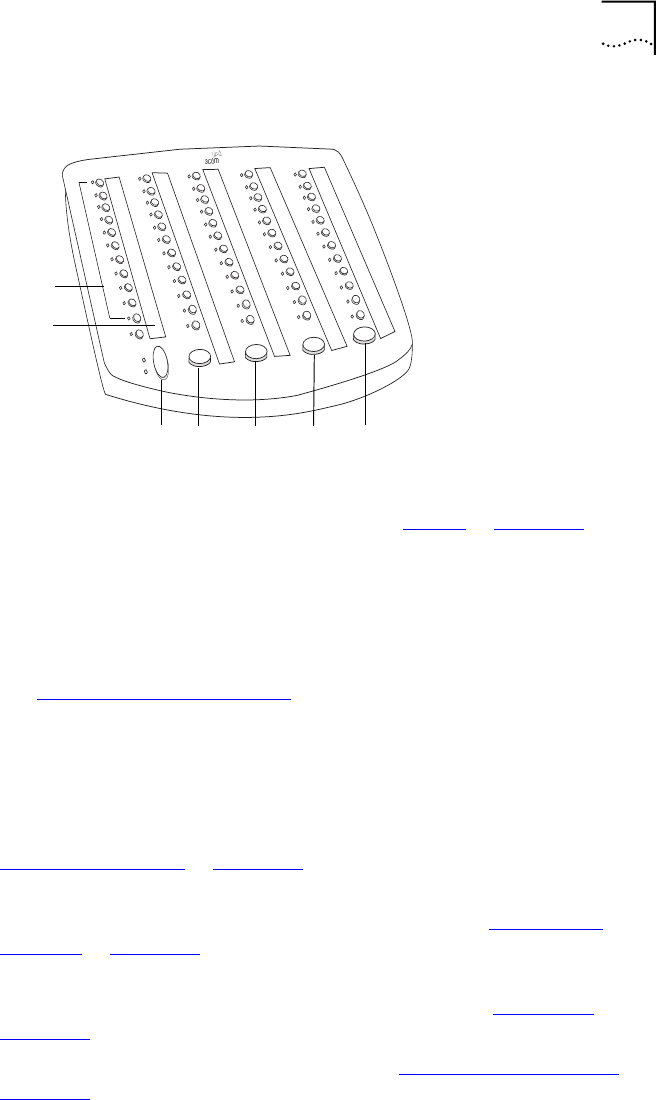
Figure 8 Attendant Console
1 Access buttons with LEDs — An indicator light next to each button
shows whether the line is available or in use and which assigned features
are enabled. For details of button status, see Table 6
in Chapter 2.
2 Labels —You can print labels for your Attendant Console using the
LabelMaker forms in the NBX NetSet utility or on the NBX Resource Pack
CD. You need Adobe Acrobat Reader 4.0 or 5.0 to open and edit the
LabelMakers. Acrobat Reader is available on the NBX Resource Pack CD
or from www.adobe.com.
See “Attendant Console Labels”
next.
3 Shift button — Enables you to toggle between the two sets of Access
buttons on the console. Press the Shift button for Access buttons
1 through 50. Press the Shift button again for Access buttons
51 through 100.
4 Transfer button — Enables you to send a call to another telephone. See
“Transferring a Call”
in Chapter 5.
5 Direct Mail Transfer button — Allows you to send a caller directly to
another user’s voice mailbox or phantom mailbox. See “Direct Mail
Transfer” in Chapter 5.
6 Call Park button — Places a call in a “holding pattern” so that it can be
retrieved from any other telephone on the system. See “Call Park” in
Chapter 7
.
7 Hold button — Places a caller on hold. See “Putting a Call on Hold”
in
Chapter 5
.
1
2
5
3
467