


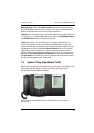

Voice over IP (VoIP) VoIP System Telephones
78
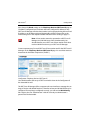
3. Enter the MAC address of the VoIP system telephone. You will find the MAC
address on the underside of the device. Click on List configuration. The status
bar at the bottom edge of the program window displays “list OK”.
4. Change the desired settings under Configuration of the IP Phone. Click on
Reset configuration to activate the standard settings for all entry fields.
5. Click on the Send configuration command to transfer the currently shown
configuration to the VoIP system telephone. The status bar at the bottom edge
of the program window displays “send OK”.
Note: The VoIP system telephone receives the configuration
and sends a response. The new configuration is only saved
and activated once this has happened. This can result in the
“IP Phone Configurator” not receiving the response of the
VoIP system telephone.
Please note: If you are operating multiple network cards with active IP
configuration in your PC, this may mean that the loading of
configuration data fails. First you deactivate additional net-
work cards or use a point-to-point connection. Sending con-
figuration data with a broadcast connection functions even
without a response from the VoIP system telephone.
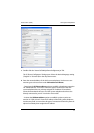
You can implement the following settings:
IP parameter locally configured: Select the yes option to activate manual IP
address configuration. Select the no option to activate automatic IP address con-
figuration via BOOTP/DHCP.
IP address and Netmask: Enter an available IP address and the network mask to
be used by the VoIP system telephone.
TFTP server IP address and TFTP server filename: Enter the IP address and the
complete file name for the operating software of the VoIP system telephone For
the Aastra 800, use always the IP address of the communications system.
Registration IP address and Registration port: This is where you usually enter
the IP address of the Aastra 800 and the port number 8100.