


13
importAnt instAllAtion guidElinEs
• Install telephone near both a telephone (modular) jack and an electrical
power outlet.
• Avoid sources of noise, such as a window by a busy street, and electrical
noise, such motors, microwave ovens, and fluorescent lighting.
• Avoid heat sources, such as heating air ducts, heating appliances, radiators,
and direct sunlight.
• Avoid areas of excessive moisture or extremely low temperature.
• Avoid dusty locations.
• Avoid other cordless telephones or personal computers.
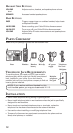
instAlling tHE pHonE
1. Choose an area near an electrical outlet and a telephone wall jack (RJ11C),
and place your cordless telephone on a level surface, such as a desk or
tabletop.
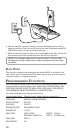
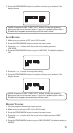
2. Plug the AC power supply into the electrical outlet and the DC connector into
the jack marked POWER/9VDC on the back of the base.
CAUTION: Use only the ATLINKS USA, Inc. power supply
5-2572 that came with this unit. Using other power supplies may
damage the unit.
NOTE: Additional handsets include their own charging cradles.
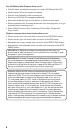
3. Install the handset battery.
CAUTION: To reduce the risk of fire or personal injury, use only the
battery, 5-2569, which is compatible with this unit.
NOTE: You must connect the handset battery before use.
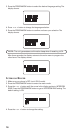
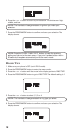
• Remove the battery cover located on the back of the handset by pressing on
the indent and sliding downward.
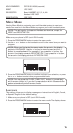
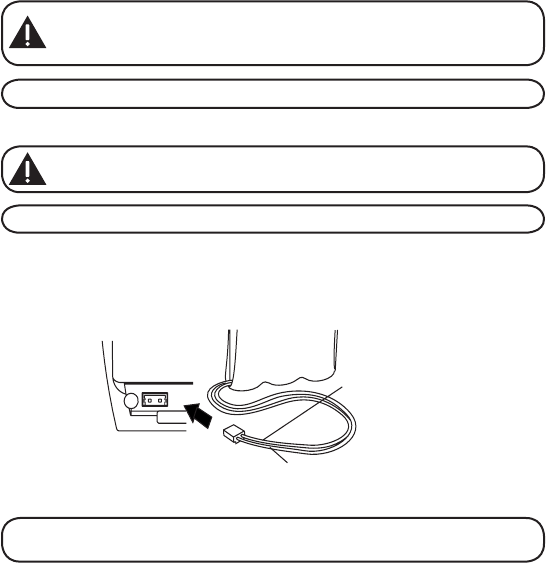
• Plug the battery pack cord into the jack located inside the battery
compartment, then place the battery pack inside the battery compartment.
NOTE: It is important to maintain the polarity (black and red wires) to
the jack inside the compartment as shown in the illustration.
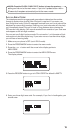
• Slide the battery compartment cover back into place.
4. Place the handset in the charge cradle. The charge/page indicator turns on to
indicate the battery is charging.
5. Allow the handset to charge, for 6 hours prior to first use. If you don’t
properly charge the handset, battery performance is compromised.
RED WIRE
BLACK WIRE
BATTERY
PRESS DOWN
FIRMLY