XTP SR HDMI Scaling Receiver • Operation 14
Menu Navigation Using Front Panel Controls
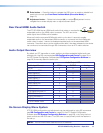
Menu button — Press the Menu button to activate the OSD menu or close submenus
items.
Enter button — Press the Enter button to select submenu items or accept changes to
settings.
Adjustment knobs — Rotate the Horizontal Adjustment (
[
) knob or Vertical
Adjustment
(
{
) knob to navigate submenus and submenu items and adjust settings.
Menu Overview
The OSD menu contains six submenus with various submenu items for adjusting settings
or viewing device information. Use the Menu, Enter, and adjustment knobs to navigate the
OSD menu.
To open the OSD menu:
1. Connect a display device to the HDMI output connector.
2. Press the Menu button to open the OSD menu.
To navigate the OSD menu:
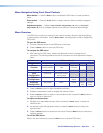
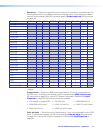
1. After opening the OSD menu, rotate the adjustment knobs to navigate the six
submenus. The following table shows the six submenus and their respective submenu
items.
Submenus Submenu Items
Image Reset Image reset
Picture
Controls
Horizontal/
vertical position
Horizontal/vertical
size
Brightness/
contrast
Detail
User Presets Recall Save
Input
Configuration
Total pixels Horizontal/vertical
active pixels
Output
Configuration
Resolution Output format Color bit
depth
Advanced
Configuration
Test pattern Blank Freeze Aspect
ratio
System
reset
2. Press the Enter button to open the selected submenu.
3. Rotate the adjustment knobs to navigate the submenu items.
4. Press the Enter button to adjust or view a submenu item or press the Menu button to
return to the list of submenus.
To adjust a submenu item:
1. Navigate to an adjustable submenu item and press the Enter button to select the
submenu item.
2. As required, rotate the adjustment knobs or press the Enter button to adjust the
submenu item.
3. Press the Enter button to accept the new value. Press the Menu button to cancel any
pending changes.
To exit the OSD menu:
While in the list of submenus, press the Menu button to exit the OSD menu.


