


Configure Handset from the Handset Display Menu
Mitel
®
5000 CP IP DECT Stand Configuration and Administration Guide – Issue 1.0, May 2010 Page 13
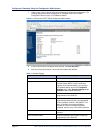
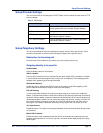
15. In the left frame of the Configurator web interface, click Time Settings, and then do the
following:
• Enter the hostname of a Time Server on the internet, for example: pool.ntp.org
• Enter the time server refresh interval, for example: 255
• Set the time difference between Greenwich Mean Time (GMT) and your current
location. For example, if you were located in New York, USA, which observes EST
you would set the Timezone field to – 5:00 hours.
• Set the Daylight Savings Time (DST) settings for your time zone as required.
16. Click SAVE CHANGES.
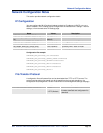
17. Click REBOOT. While the system reboots “Searching for Gateway” appears in the
display. After approximately 30 seconds, the main display appears on the handset. Basic
handset configuration is complete.
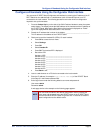
Configure Handset from the Handset Display Menu
Mitel recommends that you configure the handsets using the Configurator web interface (as
described in the previous section), especially because there are certain parameters that you
can only program through the Configurator web interface. However, you can perform basic
configuration of individual handsets from the handset’s display menu. The following procedure
covers the minimum configuration required to set up a handset using the display menu:
1. From idle mode, press the OK key, select Settings, and then press OK.
2. Choose Handset ID and press OK.
3. Record the IPEI for the handset: ____________________________.
4. Press Back. Select System settings and press OK. When prompted for a PIN code,
enter the PIN code (default 0000), and then press OK.
5. Select Handset settings and press OK.
6. Select Handset name and press OK.
7. Enter the user name of the handset user using the dial pad. The user name should
correspond to the user name that is assigned to the extension number on the 5000 CP.
8. Press OK.
9. Press Yes to save.
10. Press Back repeatedly until you return to the System settings menu.
11. Select VoIP settings and press OK. When prompted for a PIN code, enter the PIN code
(default 0000), and then press OK.
12. Select Accounts and press OK.
13. Select the desired account for the handset and press OK.