


Register the Handsets with the IP DECT Stand
Page 8 Mitel
®
5000 CP IP DECT Stand Configuration and Administration Guide – Issue 1.0, May 2010
Register the Handsets with the IP DECT Stand
To register a handset with the IP DECT Stand (gateway), place the handset in the charging
cradle. The first handset automatically registers with the IP DECT Stand after approximately 30
seconds.
To register each additional handset on the same IP DECT Stand, you must first reboot the stand
by pressing the RESET button on the rear panel of the stand. While the stand is resetting,
“Searching for Gateway” appears in the handset display. Note that you cannot register a
handset while a call is being supported on another handset because you will be unable to reset
the stand.
If you have multiple IP DECT Stands in close proximity of each other (within 50 m or 150 ft.
indoors, or within 300 m or 900 ft. outdoors), you must manually program the handset IDs
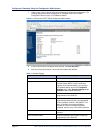
(called IPEIs) into the IP DECT Stand using the Configurator web interface (see page 9). When
you manually program the IPEI, it ensures that the handsets register with the desired stand.
Assign an IP Address to the IP DECT Stand
The IP DECT Stand requires an IP address on the LAN. Either your LAN must be configured
with a DHCP server that automatically assigns an IP address to the stand, or you must use a
cordless handset to manually configure the stand with a static IP address and subnet mask. To
manually configure the stand with a static IP address and subnet mask:
1. While in idle mode on a registered cordless handset, press the OK key, select Settings,
and then press OK.
2. Select Network settings and press OK. When prompted for a PIN code, enter the PIN
code (default 0000), and then press OK. When the IP address menu item is shown in
red, then the stand is configured to obtain an IP address dynamically from a DHCP
server.
3. Select IP Mode and press OK.
4. Select Static and press OK.
5. Press Back, select IP address, and then press OK.
6. Press Erase to delete the current entry (0.0.0.0).
7. Enter a static IP address for the stand. To enter periods in the address, press Options
and then press Insert symbols. Press OK. Save? Appears in the display. Press Yes.
8. Select Subnet mask and press OK. Enter a Subnet mask. Press OK. Save? Appears in
the display. Press Yes.
9. Press Back. You are prompted to reset the gateway (stand). Press Yes.
10. Press Back repeatedly to return to the main display.After several seconds, “Searching
for Gateway” appears in the handset main display. It takes approximately 30 seconds for
the stand to reset.
11. After the stand resets, it is configured with the static IP address and subnet mask.
“Configure SIP domain” appears in the handset main display.
12. Configure the handsets using the Configurator web interface as outlined in the next
section.
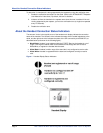
NOTE
It takes approximately 30 seconds for a handset to register. After a handset has
registered, the default handset name appears in the display.
After you register the first handset, and after you register each subsequent
handset, you must press the RESET button on the stand before it will accept the
registration of a subsequent handset. Cycling the power will not enable the stand
to accept handset registration.