Configuring Intercoms
45
• Assign IP automatically with DHCP - This option is automatically grayed out
• IP Address - Enter the a fixed IP address and the Port number of the Server Intercom.
• Subnet Mask - Enter the Server’s Subnet Mask
• Gateway - Enter the Server’s Gateway address. If no Gateway is available, enter 0.0.0.0
• Port - Enter the Port number of the Server Intercom. You can change the default Port of
3000 as long as you specify the same port in the Client Intercom’s Server IP setting.
• Location Name - This option is automatically grayed out
• Assign this PC address as client’s server - This option is automatically grayed out.
• List when Offline - This option does not apply to Direct Mode
Exit - This option closes the Intercom Configuration Tool screen
Cancel - cancels any changes made to the selected intercom before the Apply button is
pressed.
Apply - This option will save your settings to the selected intercom. After applying changes to
an intercom, the unit will be reset and will be unavailable for 10-15 seconds
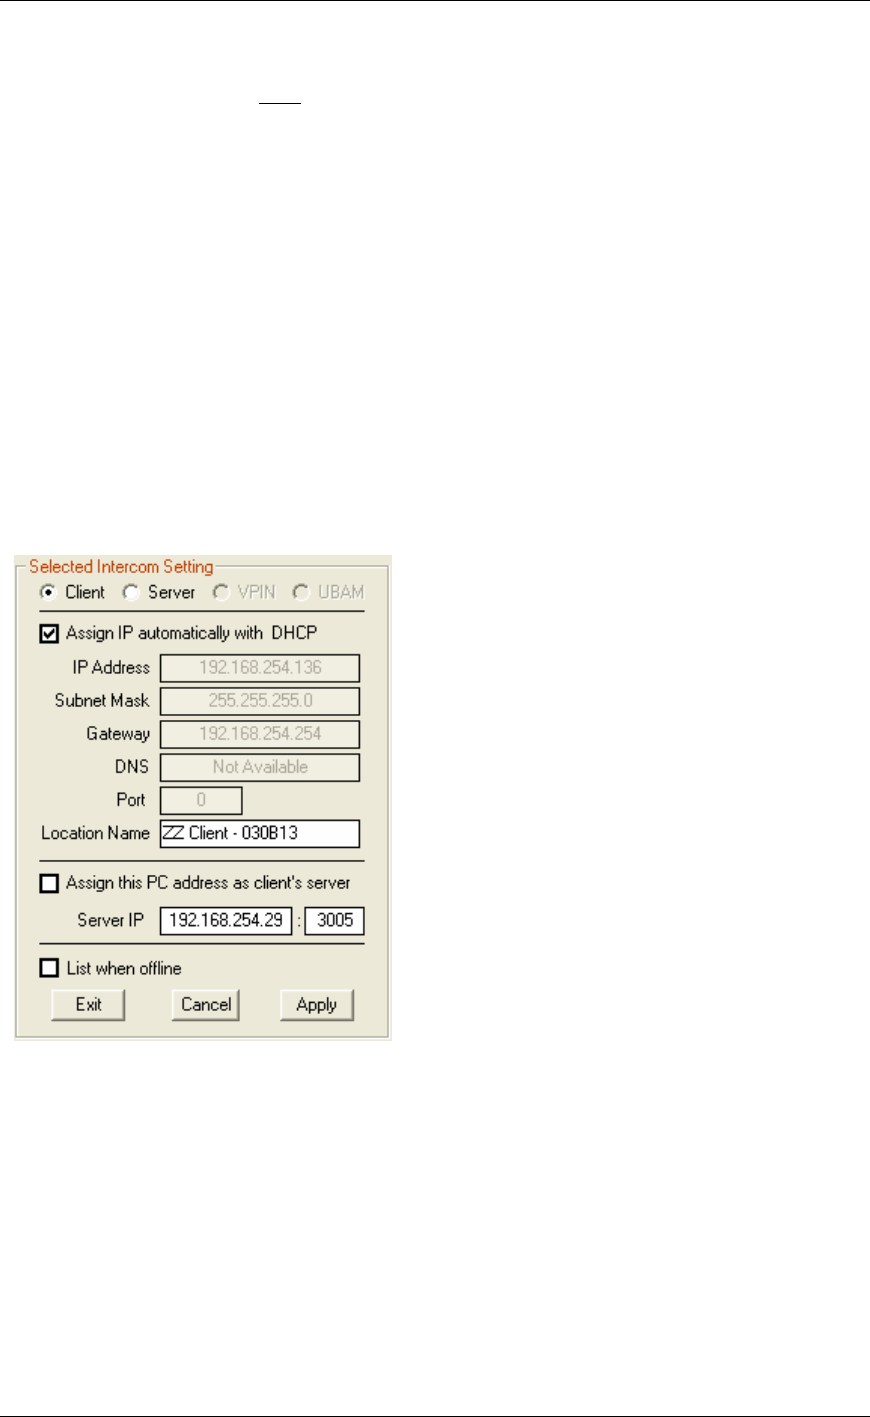
To set up the Client:
• Set as Client - Click this option
• Assign IP automatically with DHCP - The Intercom IP address information can be
assigned as a Static IP address or can be dynamically assigned if your network has a DHCP
server. To use DHCP, check the box Assign IP automatically with DHCP. Your system
MUST have DHCP assignment capability if you choose to use this option. If you are unsure
do NOT use DHCP. To assign an IP address, uncheck the box Assign IP automatically
with DHCP and fill in the IP Address, Subnet Mask and Gateway. You do not have to fill
out the Port.
• Location Name - the unique name you assign to this Intercom
• Assign this PC address as client’s server - This is automatically unchecked so you can
enter the IP address and Port number of the Server Intercom.


