Configuring Intercoms
42
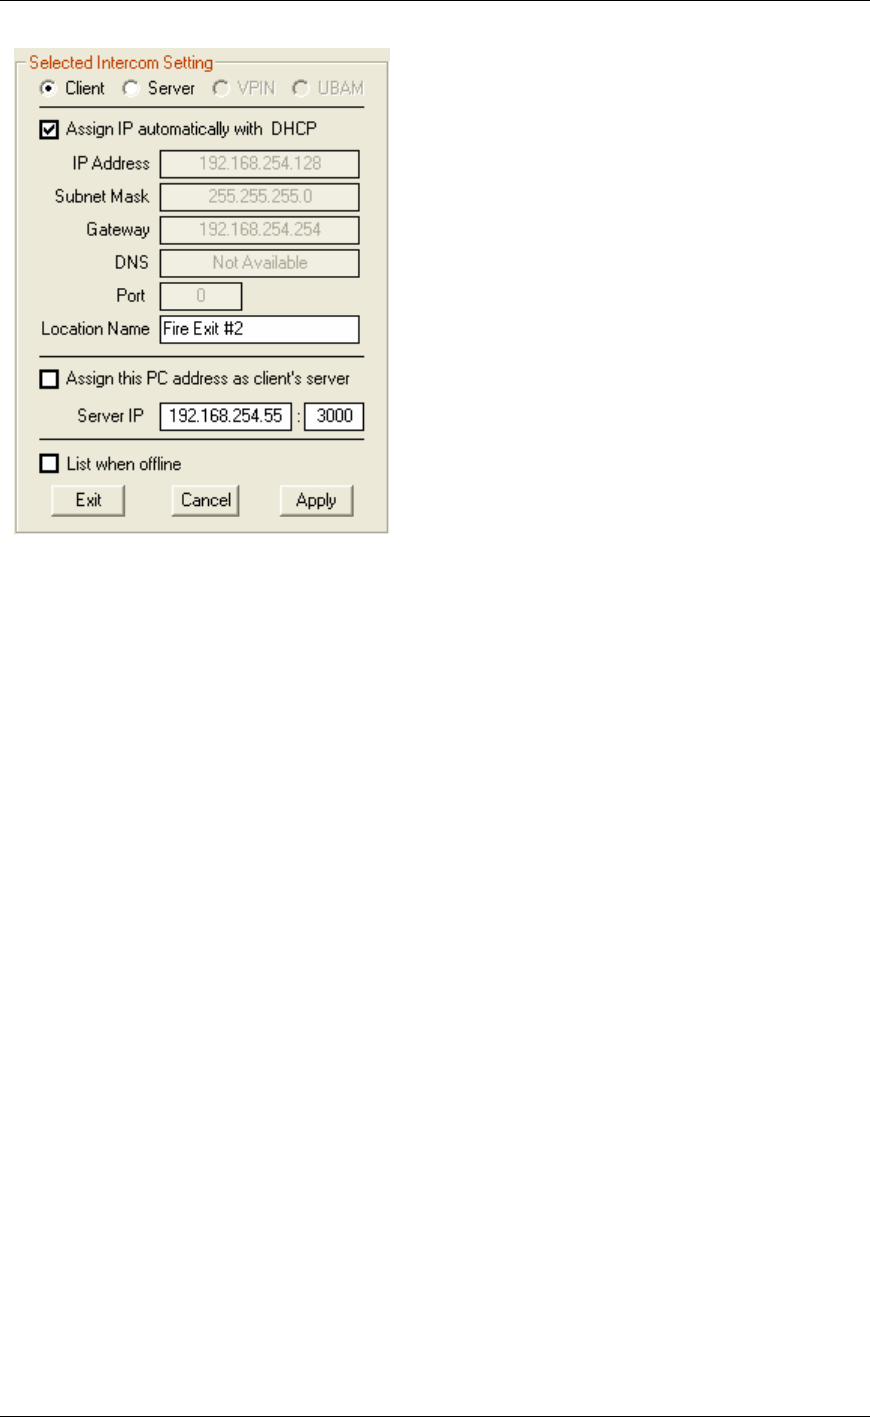
For each intercom that you want to configure, click on it and then set the options as follows:
• Set as Client - Click this option
• Assign IP automatically with DHCP - This option determines how the Intercom’s IP
address is assigned. The Intercom IP address information can be assigned as a Static IP
address or can be dynamically assigned if your network has a DHCP server.
To use DHCP, check the box Assign IP automatically with DHCP.
Your system MUST have DHCP assignment capability if you choose to use this option. If
you are unsure do NOT use DHCP.
To assign a Static IP address, uncheck the box Assign IP automatically with DHCP and fill
in the IP Address, Subnet Mask and Gateway. The Port field does not have to be filled
out.
• Location Name - Assign a descriptive text name that uniquely identifies the Intercom. This
name will display in the main TalkMaster screen.
• Assign this PC address as client’s server - This option determines the TalkMaster IP
address that the Intercom will connect to.
Check Assign this PC address as the client’s server to have the Intercom connect to this
PC.
To specify a different TalkMaster console, uncheck the box and fill in the IP address and
Port.
• List when Offline - forces TalkMaster to remember this intercom and to list it on the
Intercom View and/or Custom View whether it is connected or not. This option can also be
toggled by right clicking on Intercoms in the Intercom View / Customer View tabs. The List
when Offline/Do NOT list when Offline option only appears when TalkMaster’s Admin
menu has been enabled. Refer to Managed Intercoms for more information


