


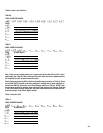


The routing patterns set up in Tables 0 through 5 and in the default tables meet all
Prime’s current needs, so Frank leaves Tables 6 and 7 blank for now.
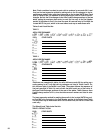
Use the form for Automatic Route Selection tables provided in the Appendix to com-
plete a similar set of ARS tables for your system. It is important to prepare these tables
carefully, so that your business gains the maximum benefit from Automatic Route
Selection. If you have a printer connected to your system, you can printout the ARS
tables as you prepare them, to serve as worksheets and for future reference.
After preparing your tables, follow the procedures below.
Administering Area Code/Exchange Sections of ARS Tables
To administer the Area Code/Exchange sections of Tables 0 through 7, follow the pro-
cedure below.
Tables 8 and 9 have no Area Code/Exchange sections for you to administer, since
they are default tables, used in calling all area codes and exchanges not specified
in the other tables. You cannot change the entries in the Area Code/Exchange sec-
tion of
1.
2.
3.
4.
5.
6.
7.
8.
9.
10.
11.
the Special Numbers Table.
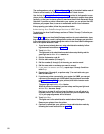
If you have not already done so, enter administration mode by follow-
ing the boxed instructions on page 25.
Touch
Adm Misc.
The lights next to the administration mode buttons stop flashing and the
green light next to
Adm Misc
remains on.
Dial the 2-character code #6.
Dial the table number (0 through 7).
Dial the number (0 through 9) of the entry you want to record.
Dial the area code or exchange you want to record.
If you want to remove an entry,
repeat steps 3 through 5 and then
touch
Drop.
Repeat steps 3 through 6, or perform step 7, for each table entry you
want to administer.
If you have a printer connected to your system for SMDR, you can get
a printout of the complete set of ARS tables. Sample printouts are shown
on pages 49 through 51. To get a printout, dial the 4-character code
#902.
The green light next to
Adm Misc
flashes.
When the printout is completed, you hear a beep and the green light next
to
Adm Misc
becomes steady.
Don’t go on to step 10 until you hear the beep, or you will get an in-
complete printout. Don’t remove the printout until you’ve completed step
10, or your page alignments will be affected.
Touch
Adm Misc.
The lights next to the administration mode buttons flash again.
Remove your printout from the printer.
Continue to administer your system or leave administration mode by
following the boxed instructions on page 25.
52