


Appendix
94
Troubleshooting
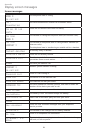
My cordless handset isn’t performing normally.
Make sure you plug the power cord securely into the telephone base. Plug the
power adapter into a different working electrical outlet without a wall switch.
Move the cordless handset closer to the telephone base. You may have
moved out of range.
Reset the telephone base. Unplug the electrical power. Wait for 15
seconds then plug it back in. Allow up to one minute for the cordless
handset and telephone base to reset.
Other electronic products such as HAM radios and other DECT phones can
cause interference with your cordless phone. Try installing your phone as
far away as possible from these types of electronic devices.
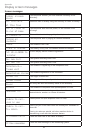
Out of range OR No pwr at base appears on my cordless handset.
Ensure you plug the telephone base in properly and the power is on.
Place the cordless handset in the telephone base for one minute to allow
the cordless handset and base to synchronize.
Move the cordless handset closer to the telephone base. You may have
moved out of range.
Reset the telephone base. Unplug the electrical power. Wait for 15
seconds then plug it back in. Allow up to one minute for the cordless
handset and telephone base to reset.
Other electronic products such as HAM radios and other DECT phones can
cause interference with your cordless phone. Try installing your phone as
far away as possible from these types of electronic devices.
The batteries do not hold a charge.
If the cordless handset is in the telephone base or charger and the charge
light is not on, refer to The charge light is off or blinking (page 97).
Charge the battery in the cordless handset for at least 10 hours. For
optimum daily performance, return the cordless handset to the telephone
base or charger when not in use.
If the battery is depleted, it may take approximately 30 minutes to charge
the handset before it shows Low battery. Refer to the table on page 7 for
details.
You may need to purchase a new battery. Please refer to
Battery installation and charging in this user’s manual on pages 7-8.
•
•
•
•
•
•
•
•
•
•
•
•
•