ADDENDUM TO ISSUE 4 OF THE AXXESS MANUAL OCTOBER 1997
Page 17 of 73
•
Install TCP/IP protocol
•
Install Service Pack 3 (which can be downloaded
directly from Microsoft’s web site)
AXXESSORY Talk Software Installation
If necessary, use the following procedure to re-install
the Windows NT version of AXXESSORY Talk ap-
plications software.
NOTE: The hard disk drive must be properly formatted
and must have Windows NT Workstation version 4.0
with Service Pack 3 installed. Also, if upgrading from a
previous version of Windows NT AXXESSORY Talk,
first stop the Avdap service in Control Panel (see page
19 for details).
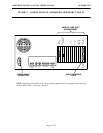
(1) If not already installed, attach the VGA monitor
to the 15-pin Monitor Card connector on the
back of the AXXESSORY Talk PC. Then, plug
in the monitor’s AC power cord and turn on the
monitor’s AC power switch.
(2) If not already installed, attach the keyboard and
mouse to their appropriate connectors on the
back of the PC.
(3) Turn on the PC’s AC power switch and allow
the system to boot up.
(4) Press Ctrl–Alt-Del, log on as the system admin-
istrator, and the press the OK command button
to continue.
NOTE: In the default state, the NT system ad-
ministrator does not have a password. Inter-Tel
recommends setting up a password.
(5) Insert Applications Software Disk 1 of 5 in the
PC’s floppy disk drive.
NOTE: “Applications Software” disks 1–5
must be installed. For optional Japanese voice
prompts, “Japanese Prompts” disks 1–3 may
also be installed as described in step 30.
(6) Select “Start” and then “Run.”
(7) In the Command Line text box, enter “A:setup”
(or “B:setup” if the B drive is used). Then select
the OK command button.
NOTE: If necessary, you can select Cancel
from any setup window to exit without perform-
ing the installation. Also, during the file instal-
lation process, pressing ESC will exit the setup
program without completing the installation.
(8) A Welcome window appears. Select the Next
command button to begin the installation. If the
software has been installed before, you will be
asked to stop the Avdap service.
(9) A Select Destination Directory window asking
you for the desired destination directory name
appears. If the software has been installed be-
fore, the previous directory will be the default
value, if not it is C:\AVDAP.
(10) To use the default drive and directory name, se-
lect the Next command button. To select anoth-
er drive and/or directory, select the Browse
command button and follow the displayed in-
structions. If you are re-installing software, skip
to step 15.
NOTE: If the directory already exists, a mes-
sage displays asking if you are sure you want to
use that directory. Select the Yes command but-
ton to continue.
(11) The next window asks, “Create Installer Ac-
count?” If you want a user account for the in-
staller to log into Windows NT, select Yes. If
not, select No and skip to step 15.
(12) The User Account Information window appears.
Enter the desired logon name.
(13) Enter and then verify the password. This is a
case-sensitive password that can contain up to
25 characters (any character).
(14) Select the Next command button to continue.
(15) When the “Ready To Install” window appears,
select the Next command button.
(16) Follow the installation instructions displayed on
the monitor to install disks 2–5.
(17) After most of the files from the fifth disk are
installed, a Rhetorex Configuration Wizard
window appears. Select the Next command but-
ton to continue.
(18) A Board Information window appears. Select
the Add command button.
(19) Select VP (RDSP/Vantage) as the Board Type.
(20) Select the appropriate model from the list. The
model depends on number of ports. For exam-
ple, use RDSP/4000 for four ports, RDSP/8000
for eight ports, RDSP/24000 for 24 ports, etc.
(21) Set the Address to 300 (default) for the first
board in the PC. Use 308 for the second board
and 310 for the third board.
NOTE: If any VPCs are later added or removed
from the system, the Rhetorex Configuration


