4-13
Cisco IP Phone Administration Guide for Cisco CallManager 3.3, Cisco IP Phones 7902G/7905G/7912G
OL-6313-01
Chapter 4 Configuring Network Settings on the Cisco IP Phone
Modifying DHCP Settings
Step 5 Scroll to DHCP Enabled.
If DHCP is enabled, the option appears as
DHCP Enabled YES
Step 6 Press the No softkey to disable DHCP.
Step 7 Press Save.
Related Topics
• Enabling DHCP, page 4-10
• Releasing a DHCP Address, page 4-13
• Configuring IP Settings, page 4-15
Releasing a DHCP Address
When moving the phone to a new network segment, you should first release the
DHCP address. You cannot perform this procedure from the Phone Configuration
web page. Instead, you must use the IVR system (for the Cisco IP Phone 7902G)
or the phone’s Network Configuration Screen (for the Cisco IP Phone models
7902G/7912G).
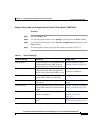
Using the IVR System (Cisco IP Phone 7902G)
Step 1 Lift the handset, then press and hold the Menu button for about 3 seconds.
Step 2 Press 4444 to release the DHCP address.
Step 3 Hang up the phone. The phone resets.


