


Example FortiGate Voice branch office configuration Configuring basic FortiGate Voice network and UTM settings
FortiGate Voice Version 4.0 MR1 Administration Guide
01-410-112851-20100601 21
http://docs.fortinet.com/ • Feedback
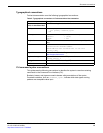
4 Change other settings if required and select OK.
To configure FortiGuard services for the FortiGate Voice unit
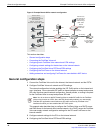
Use the following procedure to configure the FortiGate Voice unit to connect to the
FortiGuard Distribution Network (FDN) to update the antivirus, antispam and IPS attack
definitions. Before you can begin receiving updates, you must register the FortiGate Voice
unit from the Fortinet Support web site. For more information, see “Registering your
Fortinet product” on page 15.
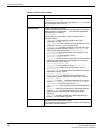
1 Go to System > Maintenance > FortiGuard.
2 Select the expand arrow for AntiVirus and IPS Options to expand the options.
3 Select Update Now to update the FortiGuard services and definitions.
If the connection to the FDN is successful, the web-based manager displays a
message similar to the following:
Your update request has been sent. Your database will be updated
in a few minutes. Please check your update page for the status
of the update.
After a few minutes, if an update is available, the FortiGuard page lists new version
information for the FortiGate services and definitions. The system dashboard license
information widget also displays new dates and version numbers for the FortiGuard
definitions. Messages are recorded to the event log indicating whether the update was
successful or not.
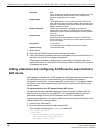
To configure basic Internet access and UTM features
This procedure describes how to add a firewall policy that allows users on the internal
network to connect to the Internet. The firewall policy includes the scan protection profile
to apply UTM features, in this case virus scanning, to this traffic. This configuration is not
required for VoIP support. It just provides users on the internal network with UTM-
protected access to the Internet.
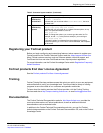
1 Go to Firewall > Policy and select Create New to add a new firewall policy.
2 Configure the following settings.
3 Select Protection Profile and select the scan protection profile to apply UTM virus
scanning to the traffic accepted by the firewall policy.
4 Select OK to save the firewall policy.
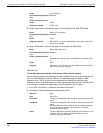
Advanced Select
DNS Server 1 172.20.120.10
Source Interface/Zone internal
Source Address all
Destination Interface/Zone want
Destination Address all
Schedule always
Service ANY
Action ACCEPT