


2 Installing the MDW 9040 Pocket Phone System Installation Procedures for Dual Radio
MDW 9040 Wireless Pocket Phone Installation and Use,
503-801-19014 Issue 2, February 2001
Installation Procedures for Dual Radio Modules
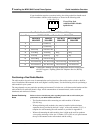
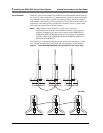
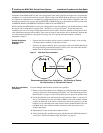
There are three types of installations according to the needs of your wireless communications system.
1 Installing one radio module for single zone operation, the simplest type of
configuration; for information on this type of configuration, use the procedures on
page 15.
2 Installing multiple radio modules for single zone operation; for information on
this type of configuration, use the procedures on page 15.
3 Installing multiple radio modules for dual zone operation; for information on
this type of configuration, use the procedures on page 17.
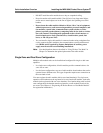
Before you begin installation, please review the “Quick Installation Overview”
section beginning on page 8 and information about positioning the radio module on
page 12.
Note: For some installers, it may be more convenient to unpack the radio
module and handset in the switch room, power up the radio module, and
then register the handset prior to installing the radio module. For this
procedure, refer to the introductory information and figures for the radio
module in this section and then follow the registration procedures
outlined in Chapter 4, “Registering the Pocket Phone to a Dual Radio
Module,” or see “A Quick Reference Procedure for Handset
Registration” on page 39.
Before you register the handset with the radio module, you must insert
the charged battery pack in the handset. See “Inserting and Removing the
Handset’s Battery Pack” later in this Chapter.
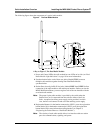
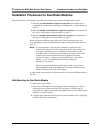
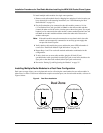
A radio module can be placed on a flat surface such as a desk or shelf OR mounted on
the wall.
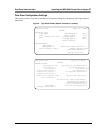
Wall-Mounting the Dual Radio Module
To wall-mount a radio module:
1 Remove the radio module and mounting plate from its shipping box. Choose a
location where one of the screw holes will be backed by a wooden stud (if
unavailable, use toggle bolts instead of the supplied wood screws). Hold the plate
straight; use a level if needed.
2 Using the plate, mark the locations for the two wall-mounting screws. Lightly tap
a nail into the wall to start the holes.