82 DSR1021/1022 Switch Installer/User Guide
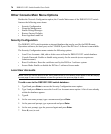
To configure a DSRIQ-SRL module:
1. Press Ctrl-F8 to open the Configuration Screen.
2. Select a parameter to change. You can navigate the Configuration Screen using the Up Arrow
and
Down Arrow keys.
3. Modify the selected value using the Left Arrow and Right Arrow keys.
4. Repeat steps 2 and 3 to modify additional values.
5. Press Enter to save your changes and exit the Configuration Screen.
-or-
Press Escape to exit the Configuration Screen without saving the changes.
Creating a DSRIQ-SRL module macro
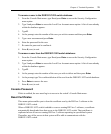
You can access the Macro Configuration screen by pressing the Page Down key while the
Terminal Applications menu’s Configuration screen is open. You can configure the DSRIQ-SRL
module with up to 10 macros. Each macro can be up to 128 characters in length.
To create a macro:
1. Select the DSRIQ-SRL module you wish to configure and press Ctrl-F8 to activate the
Terminal Applications menu’s Configuration screen.
2. When the Terminal Applications menu appears, press Page Down to view the Macro Configuration
screen. The Macro Configuration screen shows the 10 available macros and the associated key
sequences, if any, for each.
3. Using the Up Arrow and Down Arrow keys, scroll to an available macro number and highlight
the listed keystroke sequence. Type the new macro keystroke sequence over the default. Any
combination of
Ctrl or Alt and a single key may be used. When you have finished entering the
keystroke sequence that will activate the new macro, press the
Down Arrow key.
4. On the line below the macro keystroke sequence you just entered, type the keystroke sequence
that you wish the macro to perform.
5. Repeat steps 3 and 4 to configure additional macros.
6. When finished, press Enter to return to the previous screen.
Using History mode
You can use History mode to examine the contents of the history buffer, which contains the events
that have occurred. The DSRIQ-SRL module maintains a buffer containing 240 lines minimum, or
10 screens, of output. When the history buffer is full, it will add new lines at the bottom of the
buffer and delete the oldest lines at the top of the buffer.
NOTE: The Config Key Sequence, On-Line Key Sequence and Clear History Key Sequence used in the
following procedure are the default values. You can change these key combinations by using the Terminal
Applications menu.


