Setting Up the Polycom VVX 1500 D Phone
2 - 13
Deploying Phones From the Provisioning Server
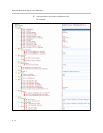
You can create two configuration files for each phone and one configuration
file for all phones in your installation or you can put all configuration
parameters into one file. The example below shows one configuration file.
For more information on why to create another configuration file, refer to the
“Configuration File Management on Polycom VVX 1500 D Phones” white
paper at
http://www.polycom.com/global/documents/support/technical/products
/voice/white_paper_configuration_file_management_on_soundpoint_ip_ph
ones.pdf .
For more detailed information on specific parameters in configuration files,
refer to Configuration Files on page A-1.
Deploy Polycom VVX 1500 D phones by:
1. Creating a Phone Configuration File
2. Creating a Master Configuration File
3. Downloading the New Configuration
Creating a Phone Configuration File
To create a phone configuration file:
1. Create a phone configuration file.
For example, create phone_0004f2be80a6.cfg
Warning
As of UC software 3.3.0, you only need to configure the parameters that do not
match their “built-in” defaults.
Certain configuration settings in Polycom UC Software 3.3.0 release are not
backward compatible to the previous configuration files (sip.cfg and phone1.cfg).
Review all configuration files used to configure the VVX 1500 D phones for previous
software releases.
For more information, refer to Configuration Files on page A-1.
Note
Use an XML editor to create/edit the configuration files. In this way, all configuration
files that you create will be valid XML files.
If the configuration files are not valid, they will not load on the phone. An error
message will be logged to the provisioning server.
Note
Obtain the phone’s MAC address from the barcoded label on underside of phone or
on the outside of the shipping box.


