


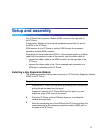


Setup and assembly
4
After the cable is attached to the phone, reconnect the ribbon cable
to the KEM.
The KEM starts when it is attached to a power source. The KEM
does not have its own power source, and it draws its power from the
IP Phone to which it is connected.
5
Wrap the clamp around the cable and screw the clamp into the back
of the IP Phone using a 3 mm and an 8 mm screw.
6
Thread the cable through the opening in the side of the IP Phone.
7
Insert the clips on the IP Phone into the hinges on the footstand and
then press onto the front of the footstand until it snaps into place.
8
While squeezing the IP Phone tilt handle, swing the footstand into
position.
9
Insert the clips on the KEM into the hinges on the module footstand,
and while squeezing the tilt handle on the module, swing the
footstand into the desired position.
—End—
Using the wall-mount option
The IP Phone and IP Phone Key Expansion Module (KEM) combination can
be wall-mounted using the optional bracket kit provided. A second KEM can
be attached to the right side of the first KEM.
Adjusting the tilt base
The IP Phone 2004 has an adjustable tilt base. Adjust the tilt of both the IP
Phone 2004 and the KEM, as needed.
53