


Telephone Installation Wall Mounting 2000 Series Telephones - Page 53
IP Office Installation Manual Telephone Installation - Page 53
40DHB0002USCL – Issue 9 (28th October 2003) Wall Mounting 2000 Series Telephones
Wall Mounting 2000 Series Telephones
Mounting brackets exist which clip onto the base on IP Office telephones. These brackets
(two required per telephone) can be used to either raise the desk position of the telephone
or for wall mounting. Before wall mounting a telephone, check that the surface is flat,
vertical and not subject to movement or vibration.
To wall mount an IP Office telephone
:
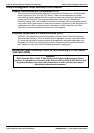
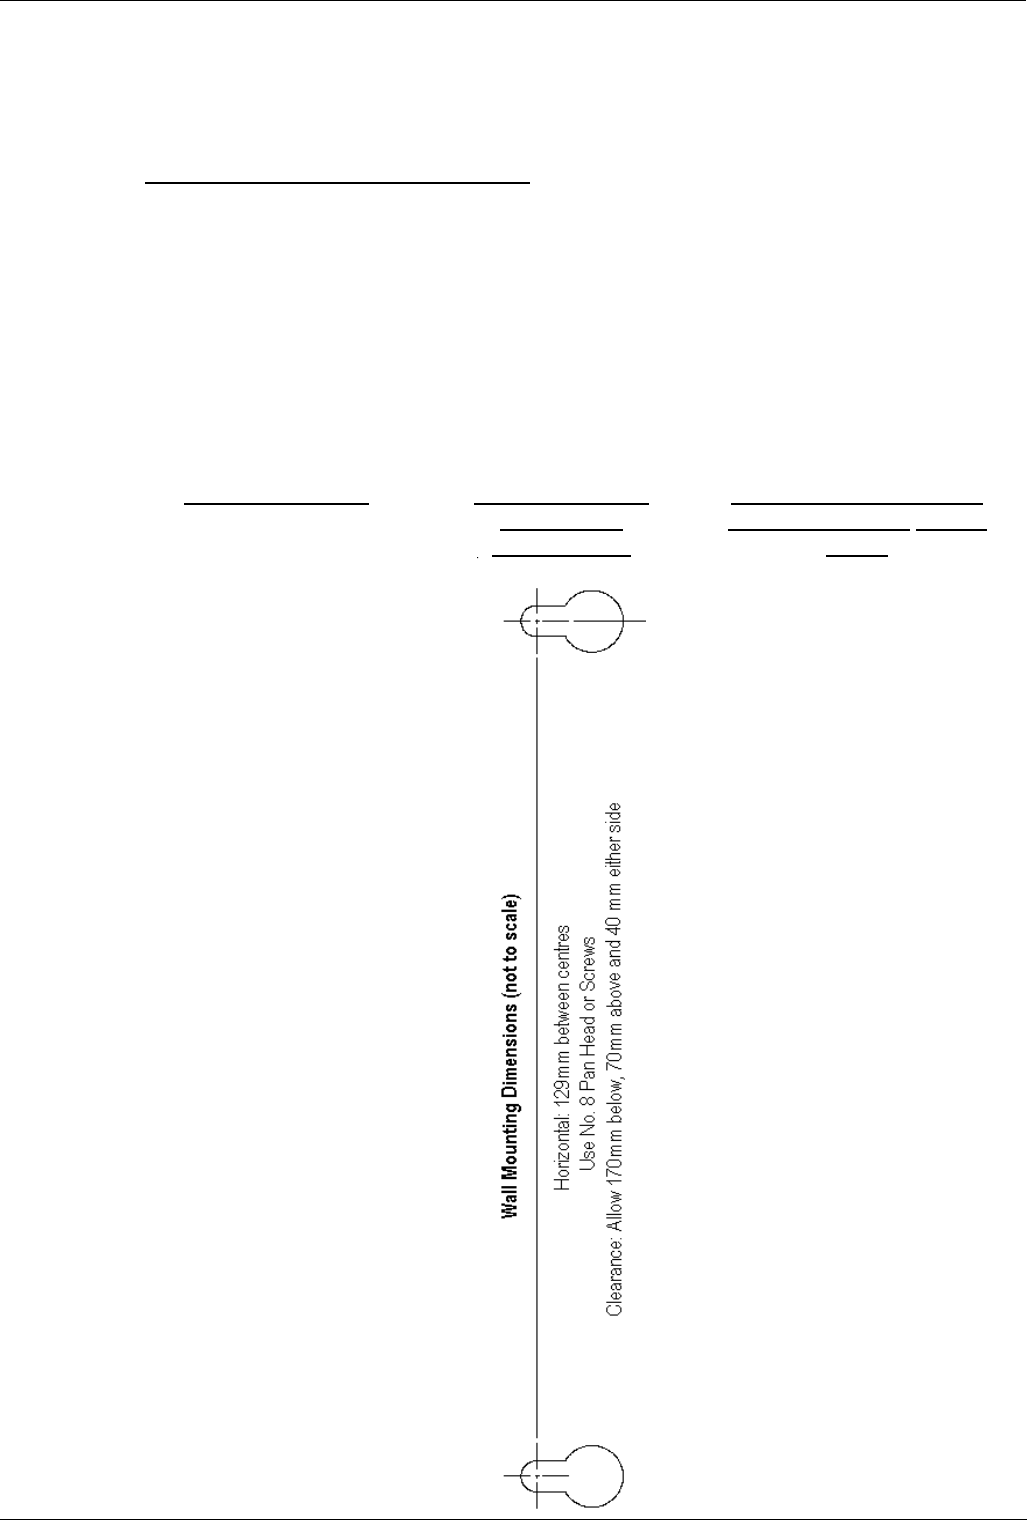
1. Using the dimensions given below, mark the position for the screw holes. Ensure that
adequate clearance above and below the telephone is allowed.
2. Drill the necessary holes and insert the wall plugs.
3. Insert the screws, leaving the heads approximately 3mm proud of the surface (check
by clipping a bracket over the screw head).
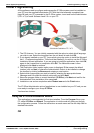
4. Attach the brackets to the telephone. Then slide the bracket key-slots over the screw-
heads.
5. Reverse the position of the handset retainer tab (located below the hook switch on the
telephone). This keeps the handset in place whilst the telephone is mounted on the
wall.
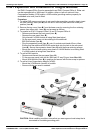
Additional Items :
– Two No. 8 Pan head
o
Round head screws.
– Two wall plugs.
– Drill and drill bit.
– Screwdriver.
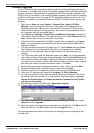
IP Office 2030/50
Telephones
(Not to scale)
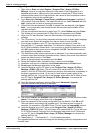
IP Office 2010 , IP Office
20AT Telephones (Not to
scale)