


Page 44 - IP401 Compact Office Wall Mounting Installing a New System
Page 44 - Installing a New System IP Office Installation Manual
IP401 Compact Office Wall Mounting 40DHB0002USCL – Issue 9 (28th October 2003)
IP401 Compact Office Wall Mounting
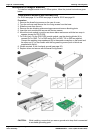
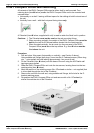
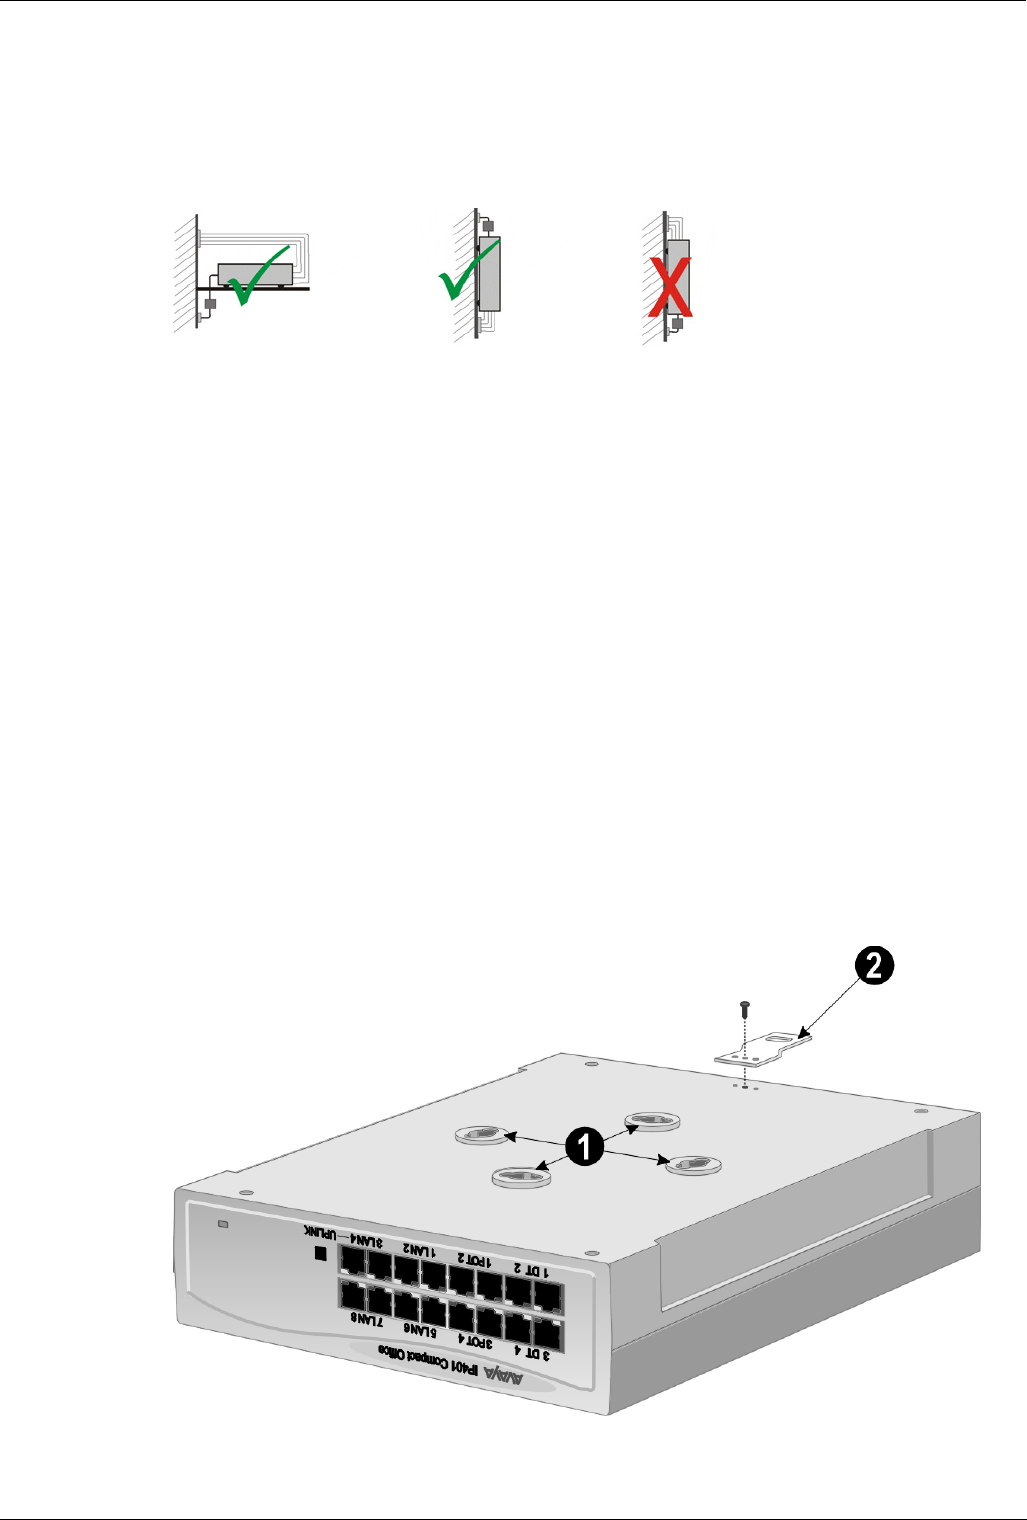
All variants of the IP401 Compact Office can be either shelf or wall mounted. Four
retaining slots (item n below) enable the IP401 Compact Office unit to be mounted and
secured either:
• Horizontally on a shelf - leaving sufficient space for the cabling at both front and rear of
the unit.
• Vertically from a wall – with the front panel facing down only.
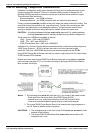
A Z-bracket (item o below, supplied with unit) is used to retain the Small unit in position.
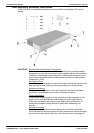
Cautions: 1. The Z-bracket must not be used as the sole mounting fixture.
2. When mounting vertically, the weight of the IP401 Compact Office must be
held by the two No 8 Panhead screws located into the retaining slots.
3. When mounted vertically, the air vents (on the rear panel of the IP401
Compact Office) must be on the top surface. E.g. item o below must be
fitted above the unit.
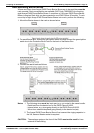
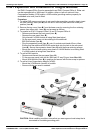
Procedure:
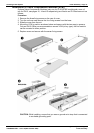
1. Drill two holes 16cm apart (horizontally or vertically – see Caution 3 above).
Using suitable wall fixings (wall plugs), insert two No.8, Panhead screws (25mm long
min. - not supplied) into wall leaving approximately 1cm proud of wall.
2. Fit the Z-bracket (item o below) onto the base of the unit using the M3 Plastite self
tapping screw supplied.
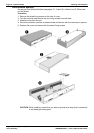
3. Slide the IP401 Compact Office unit onto the two screws, locating them into the two
retaining slots (item n below).
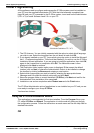
4. Mark the position of the retaining screw (No. 8 Panhead or similar – not supplied) that
is to be used through the slot of the Z-bracket .
5. Remove the unit from the wall and, using suitable wall fixings, drill a hole for the Z-
bracket retaining screw.
6. Re-position the IP401 Compact Office unit and secure with a No. 8 Panhead (or
similar) through the slot of the Z-bracket.