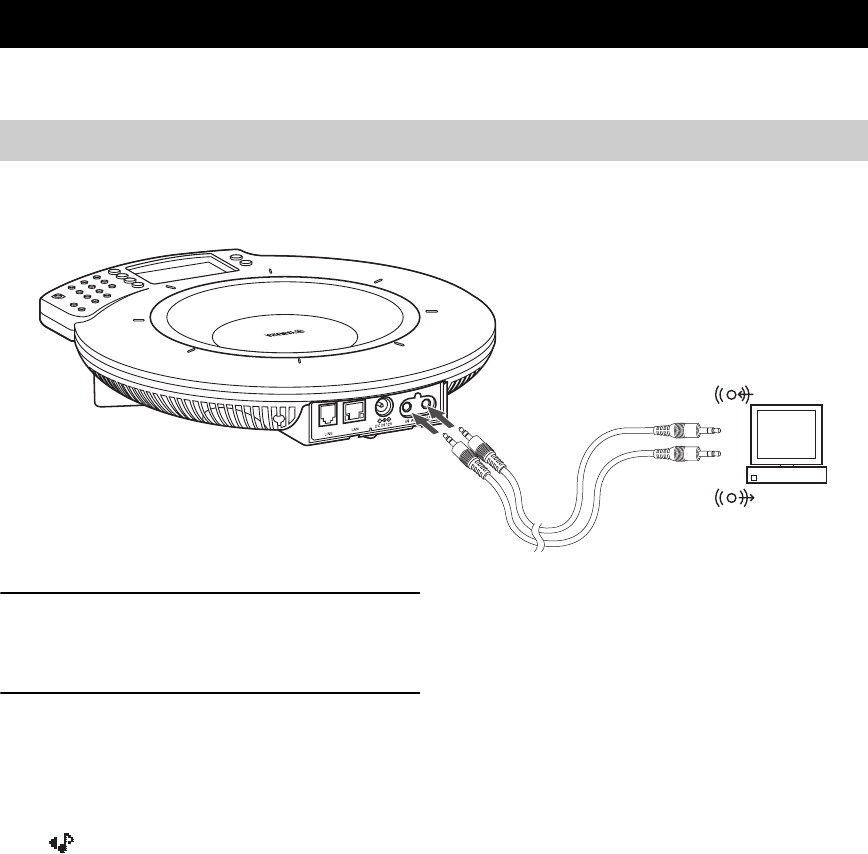
CONNECTION USING AUDIO CONNECTION CABLES
30
This system can be used as a high-performance, high-quality microphone/speaker unit when it is connected to a PC or
TV conference system with an audio cable.
■ Connection
Prepare two commercially available audio connection cables (stereo mini-jack cables).
1 Connect the AUDIO IN jack of this unit to the
audio output terminal of the PC or Video
Conference system.
2 Connect the AUDIO OUT jack of this unit to
the audio input terminal of the PC or Video
Conference system.
■ Setup of this unit
Set “External Input/Output” to “Audio”. The display
shows .
Using the keys on this unit
In the initial display, select “Menu” → “Settings” →
“Sound Settings” → “External I/O” → “Audio”.
Using the Web menu
In the Web menu, select “External Input/Output” →
“Audio”.
y
• The audio may be distorted or too low in certain operating
environments. In such a case, adjust “Audio Input” and “Audio
Output” in the “Audio Fine Adjustment” menu. For details, see
page 19.
• Change the settings of the audio input/output of the connected
PC and TV conference system in advance. See “Setting of PC”
(page 32) for the settings of the audio input/output of PCs.
• The designs of the line input/output terminals of TV conference
systems vary depending on the models. Always use audio
connection cables having the plugs matching the line input/
output terminals of the connected TV conference system. Note
that the plugs connected to the ProjectPhone system of the
audio connection cables should always be the stereo mini-plugs.
Connection Using Audio Connection Cables
Connecting with a PC or TV conference system
To audio input terminal
To audio output terminal
