––––––––––––––––––––––––––––––––––––––––––––––––––––––––––––––––––––––––––––– System Installation
119
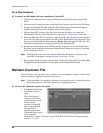
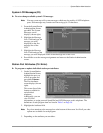
Options Menu
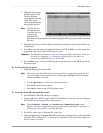
➤ To change the color of an item
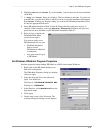
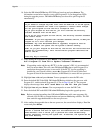
1. From the pop-up dialog box, highlight the Yes for the Change Colors option and press
Enter. The Color Selection screen displays.
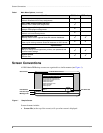
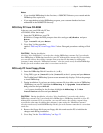
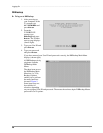
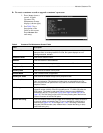
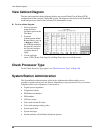
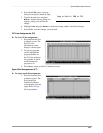
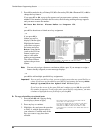
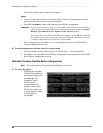
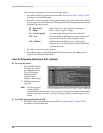
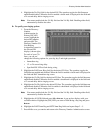
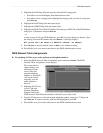
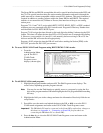
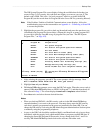
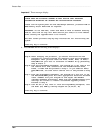
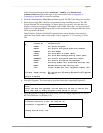
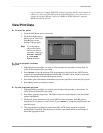
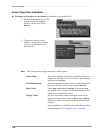
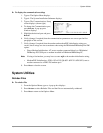
The Color Selection
screen (shown right)
consists of an item
selection menu, a set
of item color bars, and
a sample screen
display showing the
result of your color
selection. All three
components work
together to show an
example of your screen
selection. As you
select an item and
change its color, the sample screen changes to reflect your new color selection.
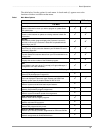
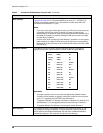
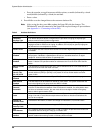
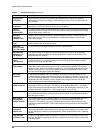
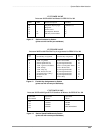
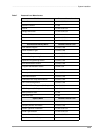
You can change the color of the following screen items:
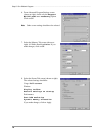
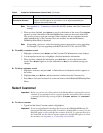
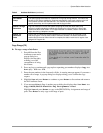
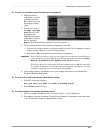
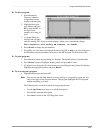
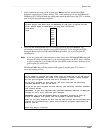
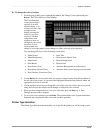
2. Use the Enter key to choose the item you want to change from the Item Selector Menu at
the left side of the screen. As you move the highlighter down the Item Selector Menu, the
appropriate color bar is selected.
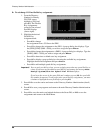
3. Use the up/down arrow keys to change the color on the color bar. Notice that as you move
along the color bar, the sample screen changes to reflect the color selected.
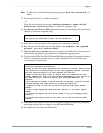
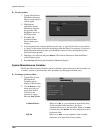
4. When you have completed all of your color selections, press the Esc key. A Save
Changes pop-up window displays.
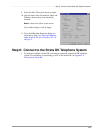
5. To save your color selections, press Enter. The system returns to the System Installation
Submenu and is displayed in the colors that you have specified.
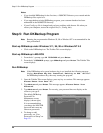
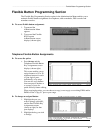
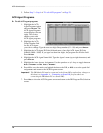
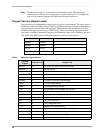
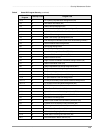
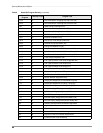
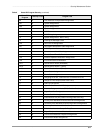
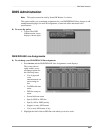
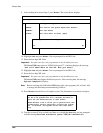
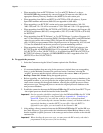
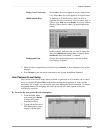
Printer Type Selection
The Printer Type Selection option enables you to specify the printer you will be using to print.
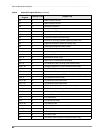
♦ Menu Screen ♦ Data Title
♦ Menu Background ♦ Data Special (Special Text)
♦ Menu Items ♦ Browse Background
♦ Data Border ♦ Browse Item
♦ Data Screen (Text) ♦ Attention Background (error messages)
♦ Data Select (Selected Text) ♦ Attention Select (error message item selected)
♦ Data Unselect (Unselected Text)