INSTALLATION-PERIPHERALS
SECTION 100-816-207
MARCH 1993
7-16
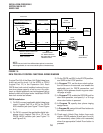
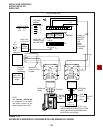
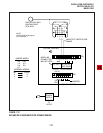
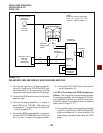
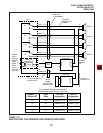
4.23 Amplified Speaker Installation. Install the
HESB Amplified Speaker option in accordance
with the following steps (refer to Figure 7-12):
1) Connect a jumper between terminals 1 and 2
of the HESB TB1 terminal block.
2) Connect a jumper between terminals 6 and 7
of the HESB TB1 terminal block.
3) Connect a jumper between terminals 5 and 8
of the HESB TB1 terminal block.
4) Connect a jumper between terminals 3 and 4
of the HESB TB2 terminal block.
5) Connect a jumper between terminals 5 and 6
of the HESB TB2 terminal block.
6) Connect the 600 ohm PAGE RCA jack output
on the DK8 KSU or DK16 Base Unit to termi-
nals 3 and 4 of the HESB TB1 terminal block.
7) Connect the power supply’s +12V lead to
terminal 1 of the HESB TB2 terminal block,
and connect the 0V lead to terminal 2.
8) Plug the provided power cord into the power
supply and to a 117VAC, 60Hz power source.
4.24 Amplified Speaker Test. Test the amplified
speaker installation in accordance with the follow-
ing steps:
1) Make an external page.
Page should be heard over the HESB.
2) Adjust the HESB volume control to the desired
level (screwdriver adjustment on back of
HESB).
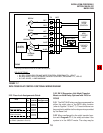
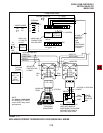
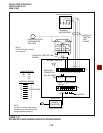
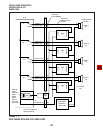
4.25 HESB/MDFB Talkback Amplified Speaker
Installation. Install the HESB/MDFB Talkback Am-
plified Speaker option in accordance with the fol-
lowing steps (refer to Figure 7-13):
1) Connect a jumper between terminals 1 and 2
of the HESB TB1 terminal block.
2) Connect a jumper between terminals 3 and 4
of the HESB TB2 terminal block.
3) Connect a jumper between terminals 5 and 6
of the HESB TB2 terminal block.
NOTE:
HESB connections made in steps 4 ~ 7 may
be accomplished using the HESB VOICE and
DOOR PHONE modular jack instead of the
TB1 terminal block.
4) Connect terminal 7 of the HESB TB1 terminal
block to pin L1 of the MDFB.
5) Connect terminal 8 of the HESB TB1 terminal
block to pin L2 of the MDFB.
6) Connect terminal 9 of the HESB TB1 terminal
block to pin 1 of the MDFB.
7) Connect terminal 10 of the HESB TB1 termi-
nal block to pin 2 of the MDFB.
8) Connect the 600 ohm PAGE RCA jack output
from DK8 KSU or DK16 base unit to terminals
3 and 4 of the HESB TB1 terminal block.
9) Connect the HACU-120 Power Supply’s +12V
lead to terminal 1 of the HESB TB2 terminal
block, and connect the 0V lead to terminal 2.
10) Plug the provided power cord into the power
supply and to a 117 VAC, 60Hz power source.
4.26 Talkback Amplified Speaker Test. Test the
Talkback Amplified Speaker installation in accor-
dance with the following steps:
1) Make an external page.
Page will be heard over the HESB.
2) Verify that someone speaking into the door
phone can be heard at the paging station (with
this application, pressing the door phone but-
ton is not required to talkback through the door
phone).
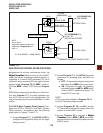
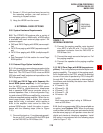
4.27 HESB Wall Mounting Instructions. The
HESB can be mounted to a wall or other vertical
surface. Use the following instruction to mount the
HESB (see Figure 7-14).
1) Find a suitable location on the mounting sur-
face for the HESB.


