8
VoIP configuration
For the FLX phone to work within a VoIP environment the phone has to be set up to
communicate to the telephone switch. You will also have to enable the extension (user)
you want to use with the FLX on your switch. Please review your switch documentation
on information on how to do that. For the minimal setup, in the FLX Handset you will
have to provide information on the IP connection to the telephone switch. To do this
visit Setup – Advanced Setup – Network Settings – VOIP Settings. Under Registrar,
provide the IP address or host name of your IP PBX. Username should be the
extension or name under which you want to register this phone on the IP PBX. In
Password, provide the password for this username. If no values are provided for ID and
Display Name, the Username entry will be used for them. Select ‘Reload Settings’ after
you have set the values in the handset, which will restart the base.
For enhanced settings the Web Interface provided by the FLX needs to be used. Go to
page 49 for a description of the web interface.
Making a call
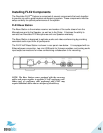
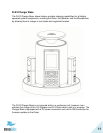
To make a conference call, take at least one of the Microphones out of the Charger
Base, and take the Dialer out of the Charger Base. You can remove all Microphones
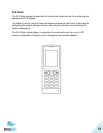
and the Speaker if you wish, but this is not required. Use the Dialer to enter the number
you want to call, including any leading digits your VoIP telephone switch might require.
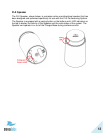
The Speaker and any Microphone that is not in the Charger Base will be active during
the call. To finish a conference call, press the red hang-up button on the Dialer.
NOTE: It is also possible to have a conference call with the
microphones in the charger base. However, due to the
proximity of microphone and speaker at that time, audio
quality might be impacted. The maximum volume of the
speaker is limited while the microphones are in the charger
base. Microphones that are placed into the charger base are
switched off. To use microphones in the charger base for
phone calls they first have to be switched on. You do this by
pressing the button on the microphone while it is in the
charger. The microphone will start in a muted state. Once it
starts blinking red, unmute it by pressing the mute button once
again. Microphones in the charger base never transmit audio
to the AUX OUT connector. If any microphone is active
outside of the charger base, microphones in the charger base
cannot be activated (unmuted) for the call.
To make a call using the Dialer as a handset, make sure that all Microphones are in the
Charger Base before starting to dial the number. At this point, only the Dialer will be
used for the call. To end the call, press the red hang-up button on the Dialer.
At any time during a call you can toggle between handset and conference phone mode
using the buttons on the Dialer.


