


18 Chapter 2 Installing the i2050 Software Phone
P0988431 Issue 03
Installing the Windows QoS Packet Scheduler
To install the QoS Packet Scheduler:
1 In the Windows Control Panel, click Network and Dialup Connections.
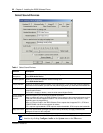
2 Right click the Local Area Connection for the device to be used and click Properties.
3 Click Install.
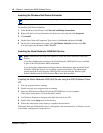
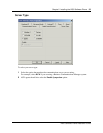
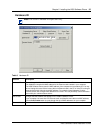
4 On the Select Network Component Type screen, click Service and then click Add.
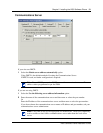
5 On the Select Network Service screen, click QoS Packet Scheduler and then click OK.
You may require the Windows 2000 CD-ROM.
Installing the Nortel Networks i2050 QoS Service
Installing the Nortel Networks i2050 QoS Service using the i2050 Software Phone
CD
1 Exit any programs that are running.
2 Disable any anti-virus programs that are running.
3 Insert the i2050 Software Phone CD into the CD-ROM drive of your computer.
If the install wizard starts, exit from the install wizard.
4 Use Windows Explorer to navigate to the QoS directory on the CD.
5 Double click on the Setup icon in this directory.
6 Follow the instructions on the display to complete the installation.
The Nortel Networks i2050 QoS Service is configured to start automatically as a Windows service
so no further configuration is required for it.
Note: You must have administrator privileges to install the QoS Packet Scheduler.
Note: Administrator privileges are required to install the Nortel Networks i2050 QoS
Service.
If you have administrator privileges, the Nortel Networks i2050 QoS Service is installed
as part of the i2050 Software Phone installation.
If you do not have administrator privileges, then an administrator must install the Nortel
Networks i2050 QoS Service for you using a separate installation. The administrator
should install the Nortel Networks i2050 QoS Service after both the Windows QoS
Packet Scheduler and the i2050 Software Phone have been installed.