19
Reference
The Rino 130 can manage up to 50 contacts at any time. Each time that you receive a signal
from a contact, your map is updated showing their new position. A Track Log of their move-
ment is created and shown on your map (see the Track Logs section). After a contact has been
established, a “<contact name> Updated” message briefly appears at the bottom of your display
each time the contact updates.
All contacts are listed on a Contact List Page and also displayed in the Contact Bar on the
Map Page (see the Map Page section). Contacts behave like waypoints and count towards the
500 maximum waypoint total. If the contact did not have a GPS location on the last transmis-
sion, a ? mark appears below the flag. To view the contact details (such as Direction, Elevation,
Timestamp, Location, and Notes that have up to 30 characters), highlight the details field and
press LEFT or RIGHT on the THUMB STICK to change to the next data field.
To accept a new contact:
1. When a new contact is received, the New Contact page automatically appears.
2. Highlight ‘OK’ and press the
THUMB STICK IN. If you do not select OK, the contact is not
saved.
To review a contact and contact details:
1. From the Map Page, highlight the desired contact of the Contact Bar and press the THUMB
STICK IN. As you highlight the contacts on the Contact Bar, the Map page centers the map
on that contact and display its name, direction and distance near the top of the screen.
Or
1. Press the
THUMB STICK IN and hold it until the Shortcuts Menu is displayed. Highlight
‘Find ‘N Go’ and press the THUMB STICK IN.
2. Highlight ‘Contacts’ and press the
THUMB STICK IN.
3. From the Contacts List, select the desired contact and press the
THUMB STICK IN.
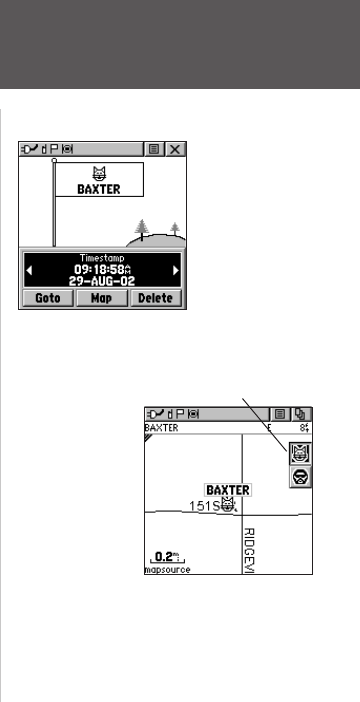
Radio Page
Contacts also show on the Map
Page. Highlight the contact and
the map centers on their last
position.
Contact Bar
Press LEFT or RIGHT on
the THUMB STICK to
view different contact data.


