~33~
b. Press 1 to enter Tone selection
c. You can adjust the dial mode between Tone and Pulse.
d. The default setting is Tone.
2. Flash
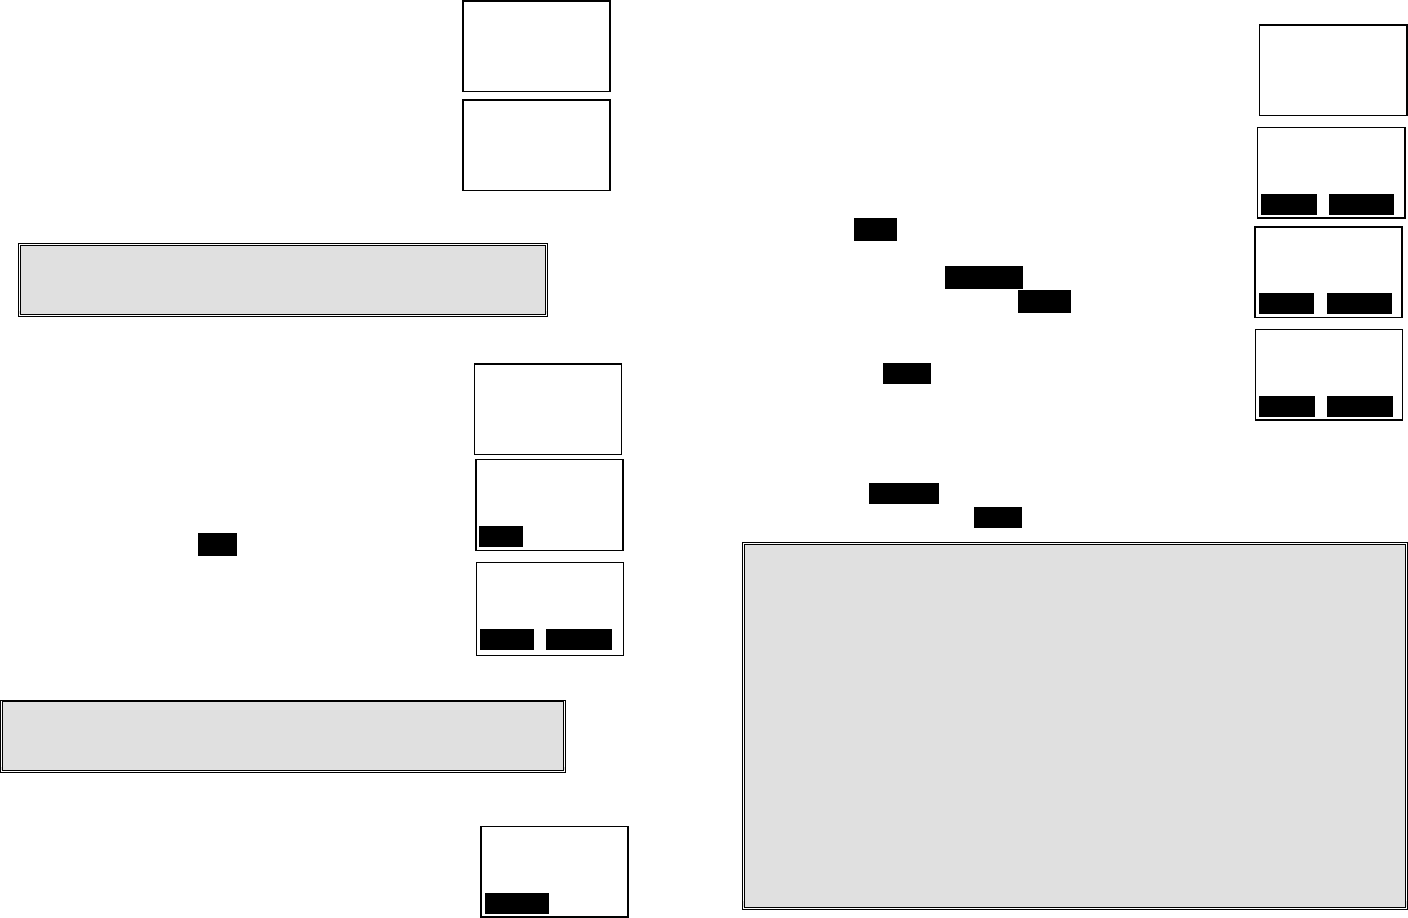
a. Press Menu-9 and enter the two-digit base ID to
enter the System mode.
b. Press 2 to enter Flash selection
c. You can adjust the flash time from 100ms to 900
ms (9 levels to choose from.) For example, press
“2” if the desired flash time is 200ms. You will see
“DONE” once you finish the setting.
d. The default setting is 600ms.
Notes: If the base station is adjunct to a PBX system, it is
recommended to adjust the flash time of DuraFon 1X to match
the PBX spec.
3. Xfer PBX
a. This function is useful if the base station attached
to the PBX system through either the analog port
or the Digital Adaptor. Press Menu-9 and enter the
two-digit base ID to enter the System mode.
b. Press 3 to enter Xfter PBX setting mode
c. Use ¿or À scrolling key to switch between ON
and OFF. The default setting is OFF.
d.
Select ON and press SAVE key
e. You can key in the specific “call transfer” feature
code and press OK to confirm the setting. For
example, if your PBX is N brand, you need to key
in “Flash”+”*”+”70” as the call transfer code.
f. You will see a “DONE” confirmation.
Notes: Since the base station is adjunct to a PBX system, you need
to adjust the flash time of DuraFon 1X to match the PBX spec and
then program the “call transfer” code.
4. Set next Handset ID to be assigned
a. This function is useful if you want to assign a
designed handset ID to a specific handset. Press
Menu-9 and enter the two-digit base ID to enter
the administration mode.
11
Flash(msec): ÇÈ
1. 100
2. 200
11
DONE
11
Xfer PBX: ÇÈ
On
SAVE
11
System: ÇÈ
2. Flash
3. Xfter PBX
11
Xfer Code: ÇÈ
Flash*70
O K DELETE
11
Please enter
Ext. #:**
CANCEL
~34~
11
Main Menu: ÇÈ
1. KeyGuard
2. PhoneBook
11
ADD OPTION
11
Number?
SAVE DELETE
11
Name?
Caps = *
SAVE DELETE
b. Press 4 and then enter two digits ID number to be assigned. You
will see “Saving Configuration” and a Done confirmation.
Phonebook Operations
1. You can store up to 30 entries in the phonebook.
Each entry can contain a phone number or handset
ID (up to 28 digits) and a name (up to14 characters).
2. To access phonebook, press menu follow by “2” or
¿or À scrolling key when handset in standby mode.
3. To add a new entry:
a.
Press ADD soft key.
b. Enter a phone number when LCD prompts
“Number?” Use DELETE soft key to delete the
last digit entered. Press SAVE when completed.
c. You will then be prompted to enter a name for the
phone number just entered.
(1) Press SAVE key to enter a phone number without
a name. All records without naming will be placed
on top of the list, in the order they are entered.
(2) To enter the name, press the corresponding keypad number one or
more times according to the order of the character on the key.
(3)
Use DELETE soft key to delete the last character entered. When
completed, press SAVE soft key to confirm your selection.
Notes:
1. When enter a phone number, the cursor automatically advances to the next
digit field. Use ¿or À scrolling key to move the cursor backward or forward
to insert or delete.
2. When entering a name, the cursor automatically advances to the next
character field if you press a different key for the next character. If you need
to enter consecutive characters from the same key, you can wait for the
cursor to advance or use ¿or À scrolling key to move the cursor backward
or forward manually. Also use ¿or À to move the cursor to insert or delete.
3. By default, all letters are entered in the upper case. Use the * key to toggle
between upper and lower cases.
4. A “Pause” entry represents a 2.8 second delay in dialing the following digits,
which is useful when calling a sequence of segmented numbers (e.g., access
code, credit card number, auto-attendant entries, etc.) Pause is entered by
pressing the * key twice (LCD displays P). Entering pause twice (PP) will
result in 5.6 seconds pause in the dialing.


