40
Avaya Definity Gx/PBXLink Integration Guide for Cisco Unity 4.0
OL-3105-15
Avaya Definity Gx/PBXLink Integration Guide for Cisco Unity 4.0
Changing the Settings for an Existing Integration
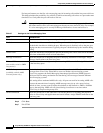
Step 24 If you are using Cisco Unity version 4.0(4) or later and have not upgraded from an earlier version, skip
the remaining steps.
Otherwise, on the Windows Start menu, click Run.
Step 25 Enter Regedit and click OK.
Caution Changing the wrong registry key or entering an incorrect value can cause the server to
malfunction. Before you edit the registry, confirm that you know how to restore it if a problem
occurs. (Refer to the “Restoring” topics in Registry Editor Help.) If you have any questions
about changing registry key settings, contact Cisco TAC.
Step 26 If you do not have a current backup of the registry, click Registry > Export Registry File, and save the
registry settings to a file.
Step 27 Expand the key HKEY_LOCAL_MACHINE\Software\Active Voice\Miu\1.0\Initialization.
Step 28 Double-click New Call Delay on Inactive Backup Server.
Step 29 In the Edit DWORD Value dialog box, in the Value Data field, enter 15000 (decimal), and click OK.
Step 30 Close the Registry Editor.
Step 31 Restart the Cisco Unity server.
No changes to the hunt group programming on the phone system are necessary.
Changing the Settings for an Existing Integration
After the integration is set up, if you want to change any of its settings (for example, to add or remove
voice messaging ports for an integration), do the following procedure.
To Change the Settings for an Integration
Step 1 On the Cisco Unity server, on the Windows Start menu, click Programs > Cisco Unity > Manage
Integrations. The UTIM window appears.
Step 2 In the left pane, double-click Unity Server. The existing integrations appear.
Step 3 Click the integration you want to modify.
Step 4 In the right pane, click the name of the cluster, phone system, or PIMG unit (depending on your
integration) for the integration.
Step 5 In the right pane, click the applicable tab for the integration.
Step 6 Enter new settings in the fields that you want to change.
Caution If you are adding or removing voice messaging ports, make sure you change the settings for
the individual ports so that there are an appropriate number of ports set to answer calls and an
appropriate number of ports set to dial out.
Step 7 In the UTIM window, click Save.


