18
Avaya Definity Gx/PBXLink Integration Guide for Cisco Unity 4.0
OL-3105-15
Avaya Definity Gx/PBXLink Integration Guide for Cisco Unity 4.0
Setting Up the PBXLink Box
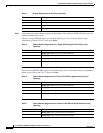
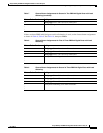
Step 18 Click Send.
Step 19 When the firmware upgrade is complete, exit HyperTerminal.
Step 20 Repeat Step 5 through Step 19 for all remaining PBXLink boxes.
Step 21 Connect the PBXLink boxes to the phone system and to the Cisco Unity server.
To Set Up the PBXLink Box
Step 1 On the PBXLink box, press Cancel until the main menu appears (the PBXLink version appears in the
display).
Step 2 On the main menu, press the Up or Down arrow to select Configuration and press OK.
Step 3 On the Configuration menu, press the Up or Down arrow to select Integration.
Step 4 Confirm that the Integration option is set to Stopped.
If the Integration option is set to Started, press OK, press the Right or Left arrow to select Stopped, and
press OK.
Step 5 On the Configuration menu, press the Up or Down arrow to select PBX Type and press OK.
Step 6 On the PBX Type menu, press OK.
Step 7 On the Select PBX Type menu, press the Right or Left arrow to select either Lucent 2 wire or
Lucent 4 wire and press OK.
If the setting that you select is not the same as the setting that first appeared, the PBXLink box restarts.
Step 8 If the PBXLink box does not restart, on the PBX Type menu, click Cancel.
If the PBXLink box restarts, on the main menu, press the Up or Down arrow to select Configuration
and press OK.
Step 9 On the Configuration menu, press the Up or Down arrow to select PBX Options and press OK.
Step 10 On the PBX Options menu, press the Up or Down arrow to select Phone Set and press OK.
Step 11 On the Phone Set menu, press the Right or Left arrow to select either 8434D or 7434D to match the
digital port setting that you entered with the Add Station command. Then press OK.
Step 12 On the PBX Options menu, press the Up or Down arrow to select Voice Coding and press OK.
Step 13 On the Voice Coding menu, press the Right or Left arrow to select one of the following options and press
OK:
• North America—Mu Law
• All other locations—A Law
Step 14 On the PBX Options menu, press the Up or Down arrow to select Analog Ports on A and press OK.
Step 15 In the Analog Ports on A field, enter the number of voice messaging ports that Port A will monitor and
press OK.
Step 16 If you setting up a PBXLink-24 box, continue to Step 17.
If you are setting up a PBXLink-48 box, do the following substeps:
a. On the PBX Options menu, press the Up or Down arrow to select Analog Ports on B, and press OK.
b. In the Analog Ports on B field, enter the number of voice messaging ports that Port B will monitor
and press OK.


