


27
Avaya Definity Gx/PBXLink Integration Guide for Cisco Unity 4.0
OL-3105-15
Avaya Definity Gx/PBXLink Integration Guide for Cisco Unity 4.0
Setting Up the PBXLink Box
Step 2 On the Configuration menu, press the Up or Down arrow to select SMDI Options and press OK.
Step 3 On the SMDI Options menu, press the Up or Down arrow to select Port A LTNs, and press OK.
Step 4 On the Port A LTNs menu, press the Up or Down arrow to select Mode of Operation and press OK.
Step 5 On the Mode of Operation menu, press the Right or Left arrow to select Random and press OK.
Step 6 On the Port A LTNs menu, press the Up or Down arrow to select Setup Random LTNs and press OK.
Step 7 In the Setup Random LTNs field, enter the voice messaging port values (not the extension) for the first
set of voice messaging port as shown in the following table, and press OK.
Step 8 After all of the voice messaging ports in the first set are set, press Cancel.
Step 9 On the Port A LTNs menu, press Cancel.
Step 10 On the SMDI Options menu, press Cancel.
Step 11 On the Configuration menu, press the Up or Down arrow to select Integration and press OK.
Step 12 On the Integration menu, press the Right or Left arrow to select Started, and press OK.
Step 13 On the second PBXLink box (which has one digital port), confirm that the PBXLink Integration option
is set to Stopped by doing the following substeps:
a. On the main menu, press the Up or Down arrow to select Configuration and press OK.
b. On the Configuration menu, press the Up or Down arrow to select Integration.
c. Confirm that the Integration option is set to Stopped.
If the Integration option is set to Started, press OK, press the Right or Left arrow to select Stopped,
and press OK.
Step 14 On the Configuration menu, press the Up or Down arrow to select SMDI Options and press OK.
Step 15 On the SMDI Options menu, press the Up or Down arrow to select Port A LTNs, and press OK.
Step 16 On the Port A LTNs menu, press the Up or Down arrow to select Mode of Operation and press OK.
Step 17 On the Mode of Operation menu, press the Right or Left arrow to select Random and press OK.
Step 18 On the Port A LTNs menu, press the Up or Down arrow to select Setup Random LTNs and press OK.
Step 19 In the Setup Random LTNs field, enter the voice messaging port values (not the extension) for the second
set of voice messaging port as shown in the following table, and press OK.
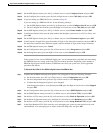
Table 28 Random LTN Settings for the First Set of Ports
LTN Number Voice Messaging Port Value
00001
10004
20007
.
.
.
<the remaining voice messaging ports in the first set>