Configure H.323 video endpoints on Communication Manager 6.0
AVTS R 6.0 Quick Setup For feedback, use document@avaya.com August 2010
18
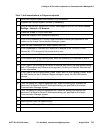
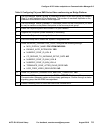
4 Use the change trunk-group n command (where n is the trunk group you added in
Step 2) to add members to the trunk group. The number of members depends on the
maximum simultaneous calls an RMX supports.
5 Use the change route-pattern n command (where nis the route pattern you want
to use) to create a route pattern that points to the two-way trunk group.
6 Install the Polycom system and connect it to your network.
7 Upgrade the Polycom system software (if necessary).
8 Access the Polycom home page for the unit.
9 From the Setup menu, select the System Configuration tab.
10
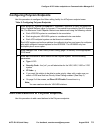
Under the MCMS_PARAMETERS_USER, configure the following settings:
● MCU_DISPLAY_NAME: POLYCOM RMX-2000
● ENABLE_AUTO_EXTENSION: YES
● NUMERIC_CONF_ID_LEN: 5
● CP_REGARD_TO_INCOMING_SETUP_RATE: NO
● NUMERIC_CONF_ID_MAX_LEN: 8
● NUMERIC_CONF_ID_MIN_LEN: 4
● TERMINATE_CONF_AFTER_CHAIR_DROP: NO
● H323_FREE_VIDEO_RESOURCES: NO
11 Under CS_MODULE_PARAMETERS, add:H245_TUNNELING: YES
12 Create an H.323 service, and enter the CLAN or PROCR IP address of the
Communication Manager system as the primary gatekeeper. Confirm through a status
signaling group that the RMX has registered.
13 Create a meeting room to use a test direct dial conference ID.
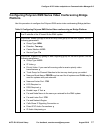
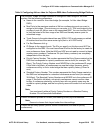
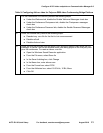
Table 8: Configuring Polycom RMX Series Video conferencing on Bridge Platform


