


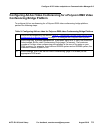

Configure H.323 video endpoints on Communication Manager 6.0
AVTS R 6.0 Quick Setup For feedback, use document@avaya.com August 2010
16
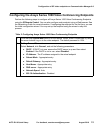
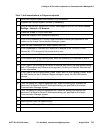
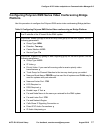
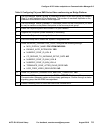
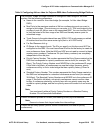
Table 7: Add users/stations to Polycom endpoints
1 Install the Polycom system and connect it to your network.
2 Upgrade the Polycom system software (if necessary).
3 Using a web browser, access the Polycom home page for the unit, and select Admin
Settings > Network > IP Network.
4 Check the Enable IP H.323 check box.
5 Check the Display H.323 Extension check box.
6 In the H.323 Extension (E.164) box, enter the station number you specified for this
system on the Avaya Communication Manager system.
7 From the Use Gatekeeper box, select Specify with PIN.
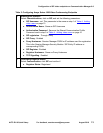
8 In the Gatekeeper IP Address box, enter the IP address of the CLAN or PCLAN
followed by: 1719 (to specify the correct port to use).
9 In the Authentication PIN box, enter the security code you entered in Step 5.
10 In the Number box in the Gateway area, enter the extension you specified in Step 8.
11 Select the Enabled PVEC check box.
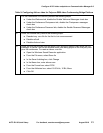
12 In the Type of Service box in the Quality of Service area, select the appropriate setting.
Both IP Precedence and Diffserve are supported. Contact your Network Administrator
for this information.
13 In the Type of Service Value boxes (Video, Audio, and Far End Camera Control), enter
the QoS values for the IP Network Region settings in which the VSX/HDX station
belongs.
14 Select the Dynamic Bandwidth check box.
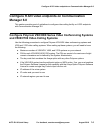
15 From the Maximum Transmit Bandwidth box, select the setting that matches the
Maximum Call Rate for Direct-IP Multimedia setting you specified for the Avaya
Communication Manager system.
16 From the Maximum Receive Bandwidth box, select the setting that matches the
Maximum Call Rate for Direct-IP Multimedia setting you specified for the Avaya
Communication Manager system.
17 Complete the Firewall and Streaming sections as necessary.
18 When finished, click the Update button.
19 Repeat Steps 1 through 18 for each Polycom system.