Chapter 6. Getting Started
Before you can run a test the EUT must be initialised so that it is page scanning with test
mode enabled.
Preparing the MT8850A/MT8852A for Use
1. Connect the RF port on the front panel of the MT8850A/MT8852A to the EUT or to
the Bluetooth antenna.
2. If you wish to use the MT8850A/MT8852A to initialise the EUT, connect the supplied
cable from the EUT control connector on the front panel of the MT8850A/MT8852A to
the EUT RS232 HCI interface.
Note: The USB device should only be connected when the MT8852A has been fully
powered.
3. Ensure the MT8850A/MT8852A is connected to the mains power supply.
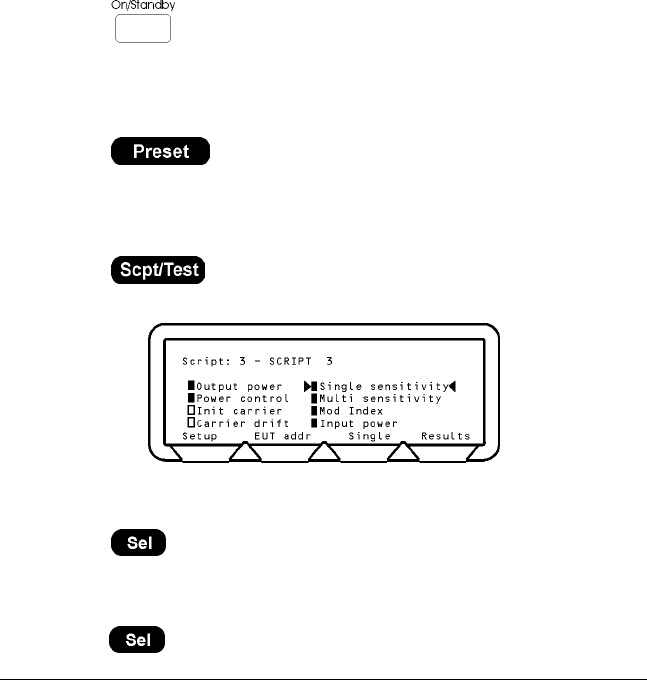
4. Press the
button on the front panel of the MT8850A/MT8852A.
The MT8850A/MT8852A performs a brief power-on self test (POST). After the POST,
the instrument displays the Script menu or the single test screen that was active when
it was powered down. If a POST error occurs, information and available options will be
displayed on the screen.
5. Press the
hard key to restore the default settings. See Appendix B -
Preset Values for details.
Selecting a Test Script
1. Press the hard key.
The Script menu is displayed.
2. Move the cursor to the Script number and:
either:
Press the
key, enter the number of the script that you want to run from the
keypad and press the
[Enter] soft key.
or:
Press the
[List] soft key and move the cursor to the test script that you want to run and
press the key.
13000-000109 6-1
June 2003 Preparing the MT8850A/MT8852A for Use
