9
GETTING STARTED USING THE SYSTEM APPENDIX
SETTING THE SYSTEM
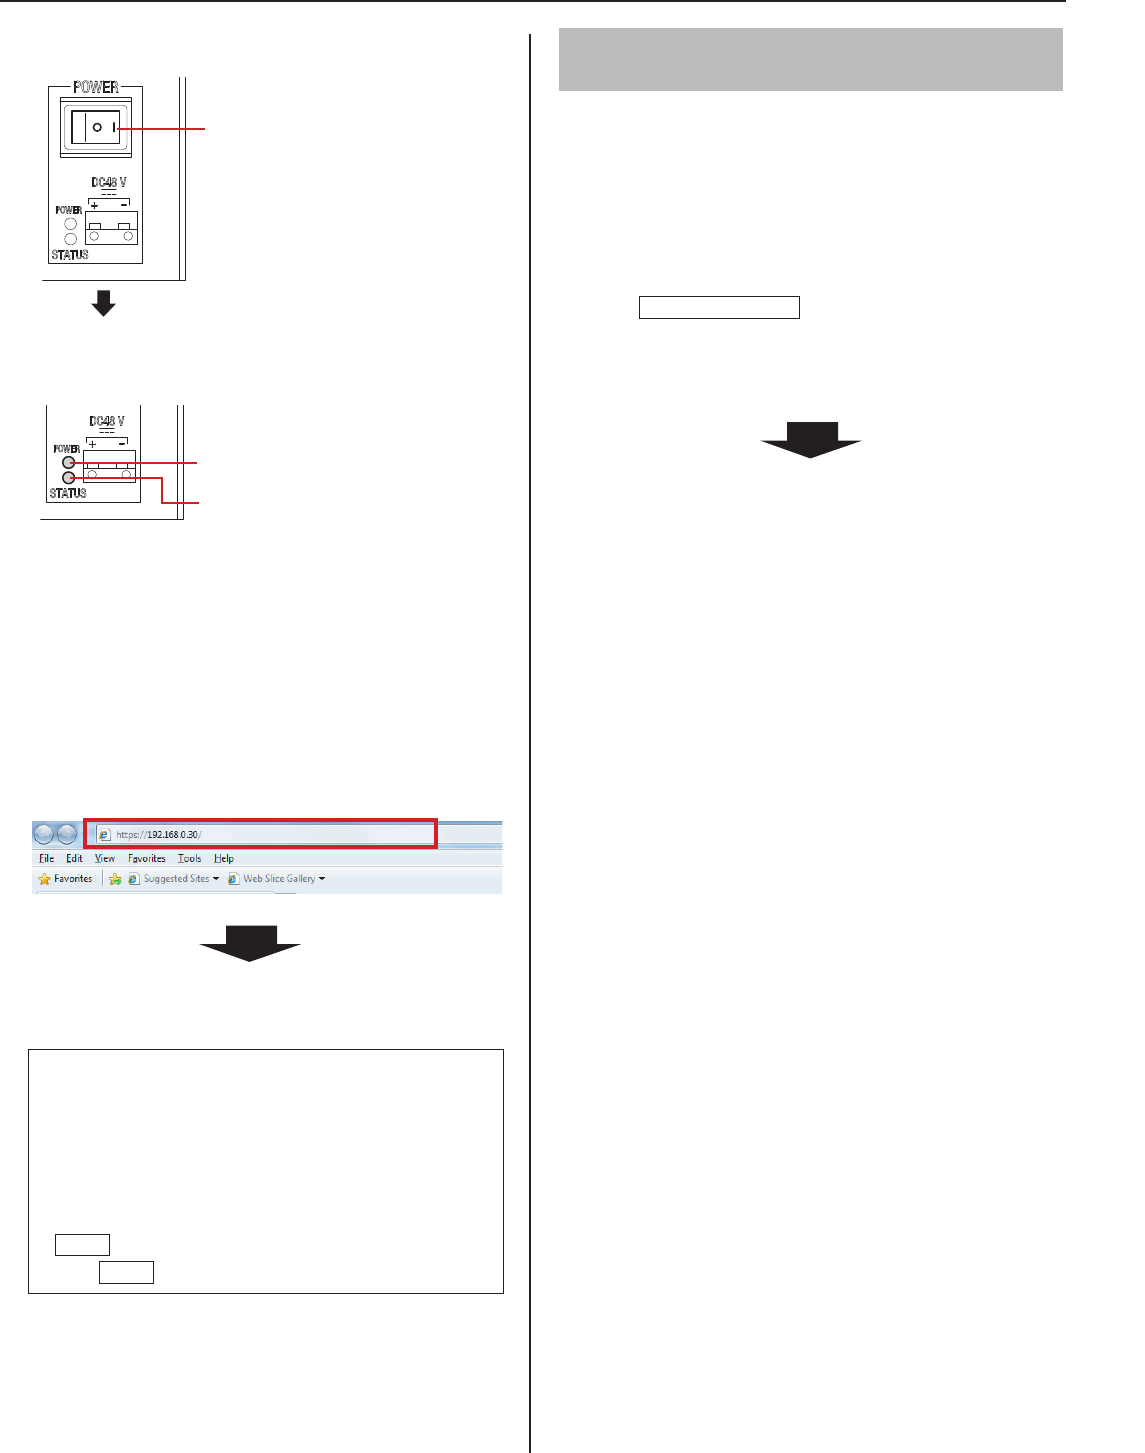
Press down the "I" side of POWER switch to turn on
2
all the control units in the system.
Start up the PC, and then open the browser window.
3
Enter the
4
static IP address (https://192.168.0.30/)
or the IP address assigned by DHCP to access the
web browser for settings.
If you do not know your IP address assigned by DHCP,
*
run “IS_IPSEARCH.exe” from the supplied CD-ROM,
and then search for it.
The login window of the web browser is displayed.
Log in to the system by setting the following items.
5
Select language
•
Select the language for displaying contents on the
setting windows.
ID
•
Enter “aiphone”.
Password
•
Enter “aiphone”.
Login
•
Click
Login
to display the setting window.
When you log in for the fi rst time, the [
*
Registration]
window appears. Register your system as needed when
the IS-CCU is connected to the IP network.
NOTE:
Be sure not to log in to the system more than once at the same
time by opening multiple browser windows on the PC.
Setting the system confi guration
[System confi guration]
After logging in to the system, the [System confi guration]
window appears.
First of all, make the setting on this window before starting the
system settings.
Select your system between “Local system” and
1
“Standard system (IP system)”.
Click
2
Temporarily stored
to save the setting result
temporarily. (→P. 10)
Start the system settings by selecting a setting title in
3
the table of contents on the left side of the window.
Go to the next page.
Confi rm that the following LEDs
*
operate as shown below.
POWER switch
Press down "I" side to turn on the
•
unit.
Press down "O" side to turn off the
•
unit.
Lights up.
Blinks
(When the system settings have
fi nished correctly, this LED turns from
blinking (initializing) to lighting.)
