


Preparation Procedure
14
After completing the settings, follow the procedure below to install this unit in the place of conference, such as a
conference room.
■ About installation environment
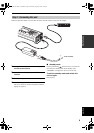
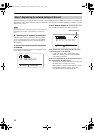
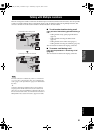
The speakers of this unit are attached in the downward orientation on the bottom panel. Place this unit horizontally on a
desktop without placing any object below this unit. In case you cannot place the unit stably because of the shape of the
desk or other reasons, attach the supplied pads (3 pieces) as illustrated.
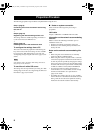
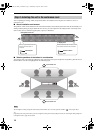
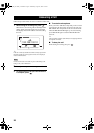
■ Take the positions of the talkers in consideration
To assure the clear conversation by making the most of the effect of arrayed microphones and speakers, place this unit so
that the talkers sit at the area highlighted on the following figure.
The microphones cannot pick up the audio clearly when the talker sits in one of the positions marked “ ” in the figure above.
y
Depending on the using environment, you can configure the setting of the audio pickup area. Refer to “Selecting the audio pickup area
(microphone mode)” (page 28) for details.
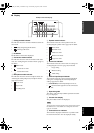
Step 3: Installing this unit in the conference room
Note
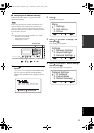
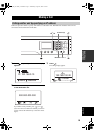
Display side
Back panel of this unit
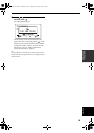
1 pad
Concave part
Pad
Rubber cushion
Pad
Attach 1 pad at the center so
that the concave part is
covered.
Attach 2 pads at the corner so that
the rubber cushions are covered.
123
456
78
9
0
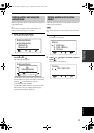
MIC MUTE
LAN
VOL
DC IN 12VIN AUDIO OUT
Front of this unit
Front of this unit
Side of
this unit
Side of
this unit
2 pads
01EN_00_PJP-100H_UCGB.book Page 14 Wednesday, August 23, 2006 3:04 PM