


10
1. Site Planning
Select a location where the speaker-
phone will not interfere with daily ac-
tivities. You can choose to connect the
speakerphone to as many as four tele-
phone lines. The speakerphone can be
connected to two 2-line (RJ14C) modu-
lar telephone jacks to accommodate all
four lines. The speakerphone is factory-
programmed for intercom extension
number 12.
When the telephone is first installed, the
display will show a message to check
the clock and the extension ID. Refer to
the Programming section to set the ex-
tension number.
IMPORTANT: For all system features
to operate correctly, ev-
ery speakerphone,
must be connected to
the same Line 2 wiring.
They do not need to be
located in the same
area.
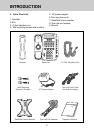
2. Installing the Speakerphone
You can choose from two (2) installa-
tion options:
•
Locate the telephone on a desk or
tabletop, or
•
Mount the telephone on the wall.
2.1 Desk/Tabletop Mounting
To have better viewing angle, you could
choose to install the desk/wall mount
bracket by squeezing the side tabs on
the thicker end of the bracket, insert
them into their respective slots.
a. Position the telephone in the desired
location on a tabletop or desk.
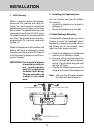
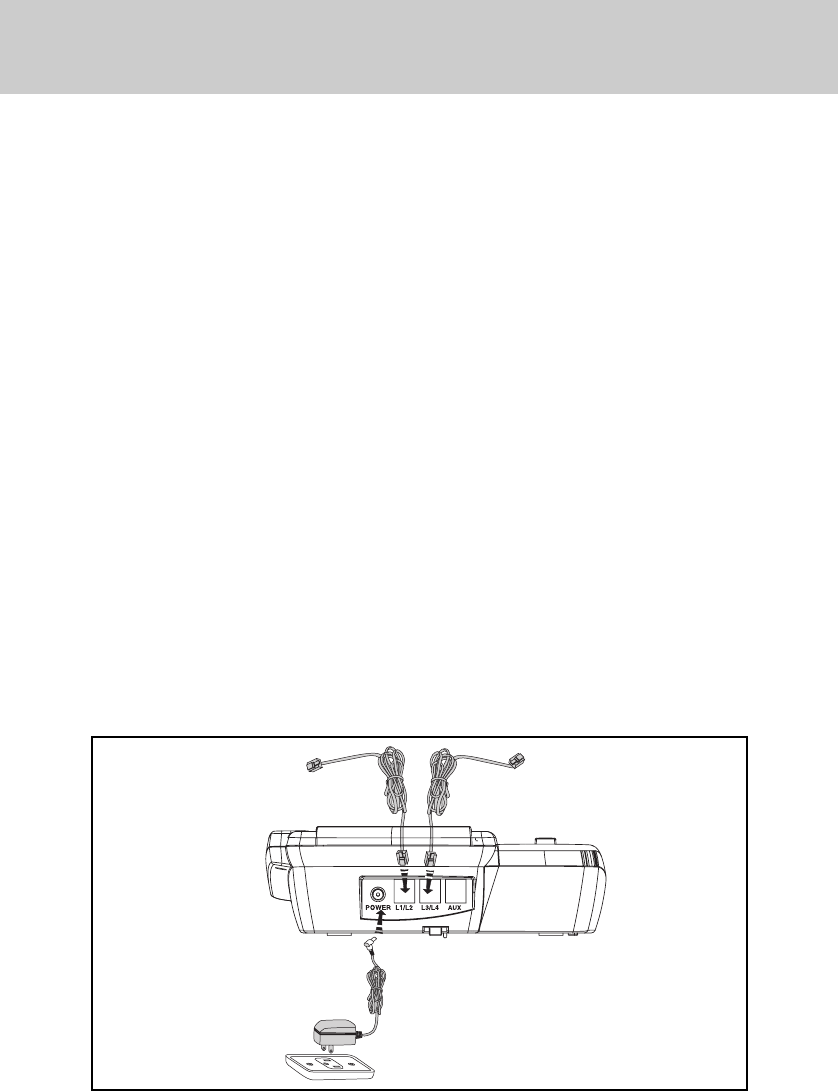
b. Plug one of the long line cords into
the L1/2 jack at the back of the tele-
phone. Plug the other long line cord
into the L3/4 jack.
c. Plug the AC adaptor power cord into
the jack at the back of the telephone.
Note: Use only the AC power adaptor
provided with the telephone.
INSTALLATION
ELECTRICAL OUTLET
L1/L2 TELEPHONE JACK L3/L4 TELEPHONE JACK