


Installation
Unpacking
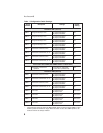
The ES4000A is supplied with the following items. Contact the shipper or your
Audiocom dealer immediately if anything is damaged or missing. Detach and fill out
the registration card and return it to Telex to properly register your intercom station.
Quantity Description
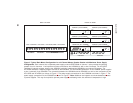
1 ES4000A Expansion Station
1 Warranty and registration card
1 User Instructions
2 Termination Plug
1 EXP IN/OUT Cable, with 1/8-inch (3.5 mm) phone plugs
1 CHANNEL OUTPUT Cable, with 15-pin connectors
4 Rubber feet (apply to bottom of ES4000A for desktop use)
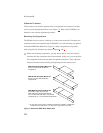
Configuration Pre-check
Before making connections, read the configuration notes that follow, and make sure
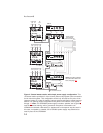
that all switches and jumpers are properly set for your intended usage. Locations of
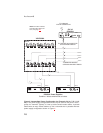
configuration switches and jumpers are shown in Figure 2
. Only the DIP switches
and jumpers require internal access. If access is required, remove one screw from the
top cover and 3 screws from each side.
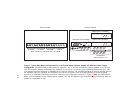
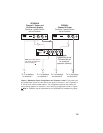
DIP Switches
DIP switches and their default settings are listed in Table 1, page 8. The following
paragraphs provide additional details.
Program Interrupt DIP Switches
Each intercom channel has a dedicated program input. These can be used to feed
background music, mix-minus audio (for broadcasting usage) etc. to the intercom
channels. If external program sources will be connected to the ES4000A, you have a
choice of whether or not you want the program audio to interrupt (shut off) on the in-
tercom channel while the US2000A/ES4000A station operator is talking.
7