


8
Entry System Mounting (Continued)
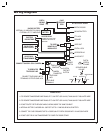
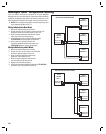
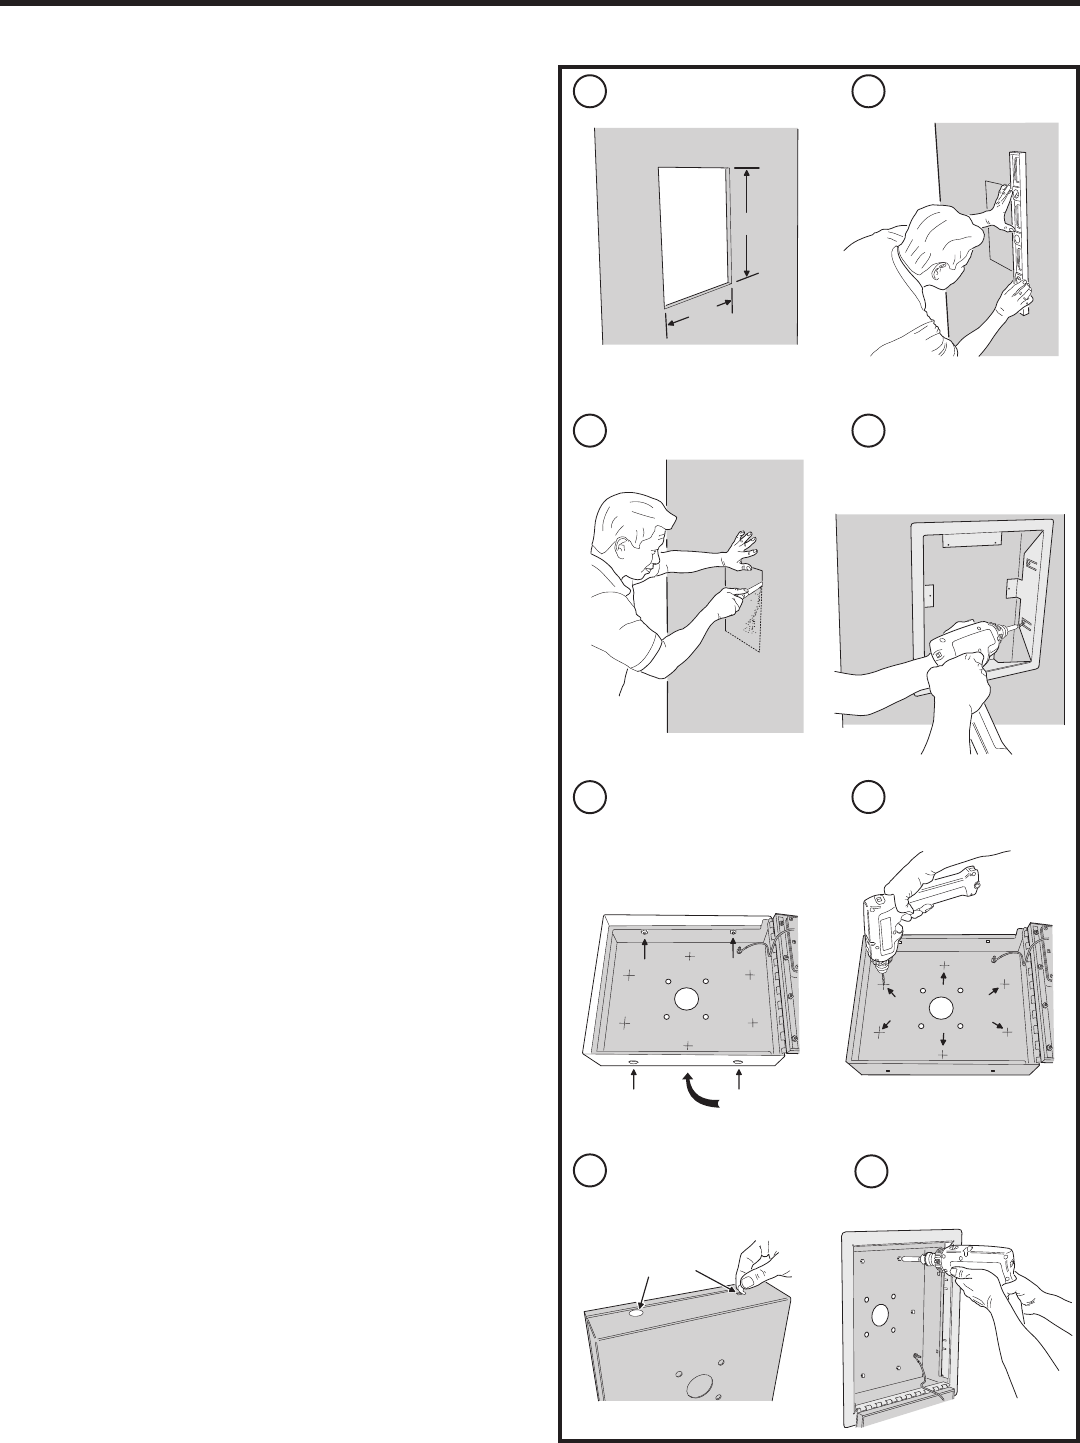
Recessed Mounting
The cabinet can be mounted recessed using the accessory trim-ring
Model TR-100 (P/N ACP00941). The trim-ring mounts in the wall and the
cabinet attaches to the trim-ring.
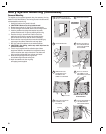
1. Identify the location of any studs in the wall.
✦ CAUTION!: Watch out for wiring inside the wall.
2. Determine and mark the 12” high by 10” wide hole location.
3. Cut the rectangular hole between studs at the mounting location.
4. Install any additional mounting shims required to provide
surfaces inside the wall 10” apart for attaching the trim-ring.
5. Place the trim-ring in the wall hole. Check for level, then
attach the trim-ring with four screws into the side tabs (the
tabs can bend out a little to meet the shims if necessary).
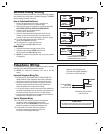
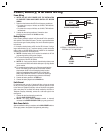
6. Remove the four nuts and bolts that connect the cabinet’s gray
outer wrap to the cabinet. Remove the outer wrap piece.
7. Drill 3/16” holes in the cabinet’s six pre-marked locations.
✦ CAUTION!: After drilling, remove any metal chips from the
inside of the cabinet.
8. The trim ring is supplied with four adhesive mylar stickers.
Apply these stickers to the cabinet’s four bolt holes that were
used to mount the outer wrap to the cabinet. The stickers will
help to seal the cabinet sides from moisture and insects.
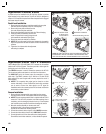
9. Route the wiring through the trim-ring and into
the cabinet through the center wiring hole.
10. Attach the cabinet to the trim-ring using
self-tapping screws supplied.
10"
12"
MARK HOLE LOCATION
4
INSTALL ANY SHIMS TO
ALLOW MOUNTING AND
ATTACH THE TRIM-RING
WITH 4 SCREWS
5
6
REMOVE THE FOUR
OUTER WRAP BOLTS
AND REMOVE THE
CABINET'S OUTER WRAP
DETERMINE LOCATION FOR
THE 10" x 12" MOUNTING HOLE
3
CUT MOUNTING HOLE
1 2
RECESSED
MOUNTING
7
8
APPLY THE FOUR MYLAR
STICKERS TO THE
BOLT HOLES
ATTACH THE CABINET TO
THE TRIM-RING WITH
SELF-TAPING SCREWS
DRILL 3/16" HOLES IN
THE CABINET AT THE
PRE-MARKED LOCATIONS
OUTER WRAP
STICKERS
REMOVE ANY METAL CHIPS
AFTER DRILLING !!!